WP Mail SMTP settings
Using WP Mail SMTP Plugin to reconfigures the wp_mail() function to use SMTP instead of mail() and creates an options page that allows you to specify various options.
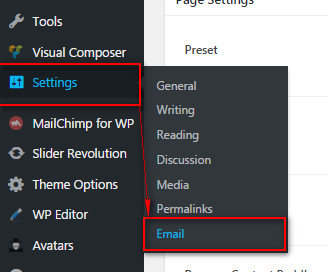
Go to Settings → Email to setup:
Goto Settings → WP Mail SMTP
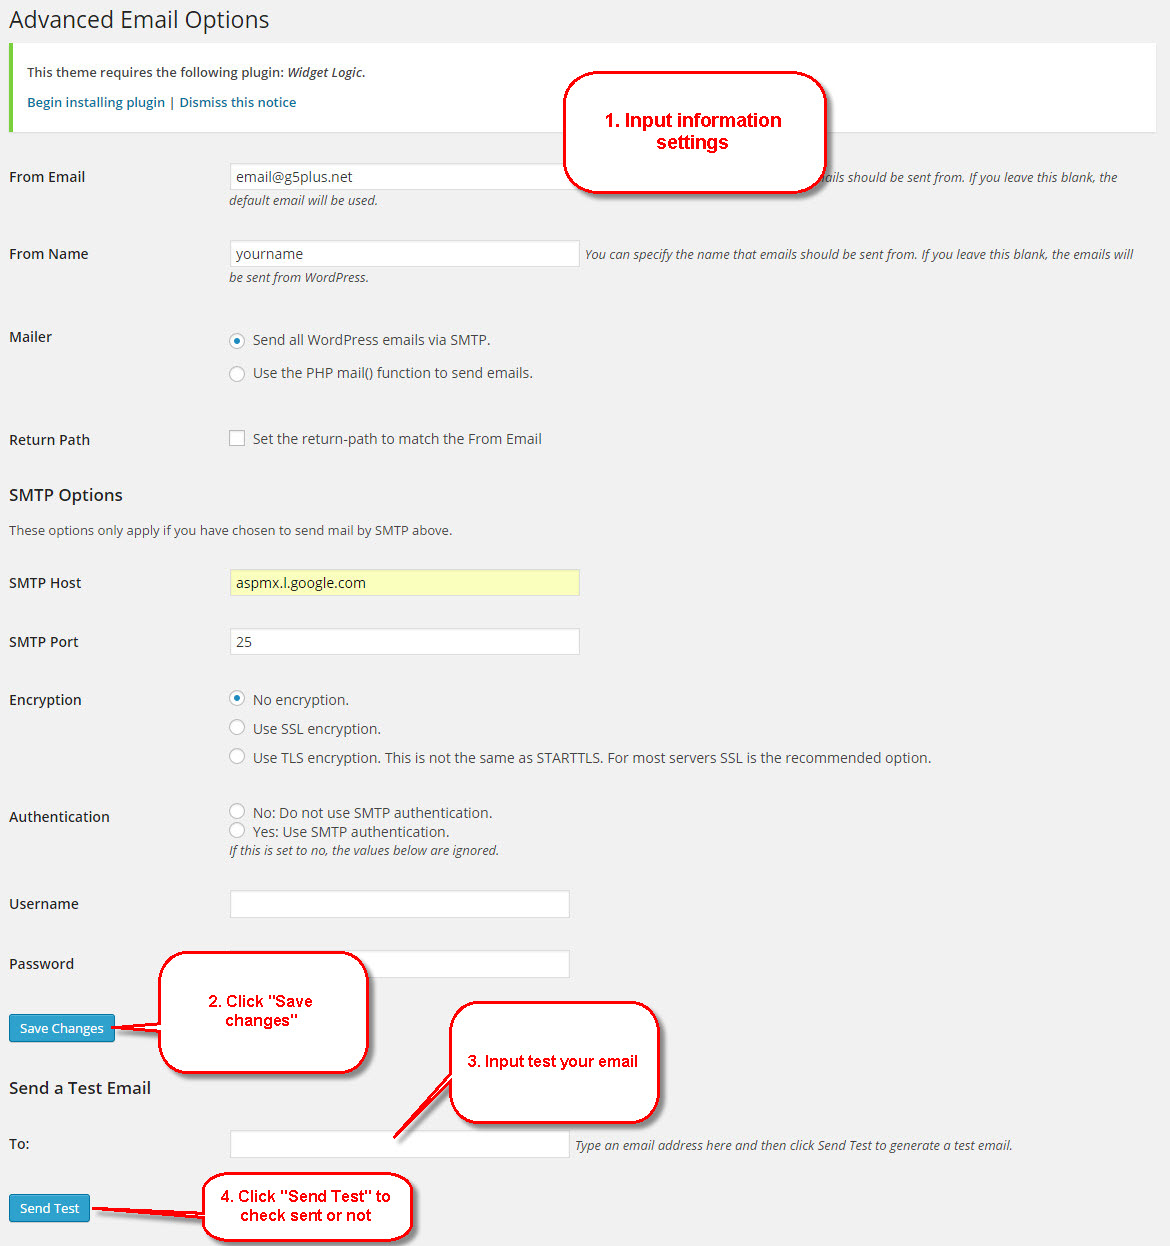
Configure SMTP Options
You can visit WP Mail SMTP Plugin to further details about this plugin and consult our guide to configure email.
Video guide on How To Configure Your Mail Client To Use GMail for Outgoing Mail Server
MailChimp settings
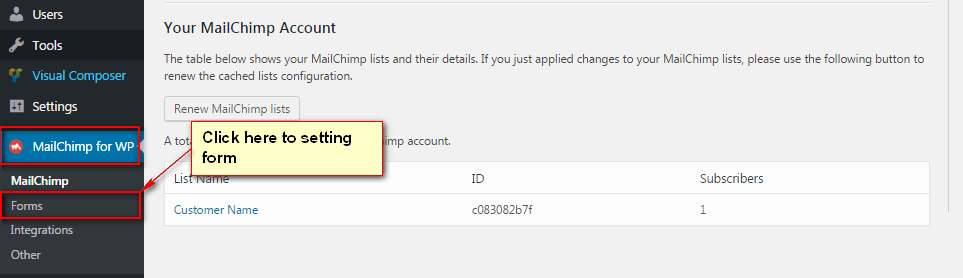
Step 1After install all required plugins, "MailChimp for WP" will be added into the navigation menu on the sidebar. Go to MailChimp for WP → MailChimp Settings to setup:
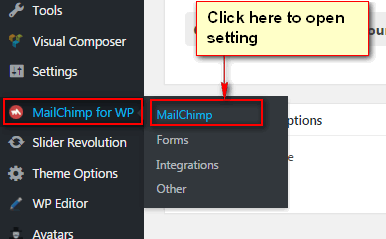
Open MailChimp settings
Step 2 - To connect your MailChimp account you will need to enter your API keys into the necessary field. The plugin provides a convenient link, below the field, which will direct you to the API key in your MailChimp account. You must be logged in to your MailChimp account for the link to work as expected.
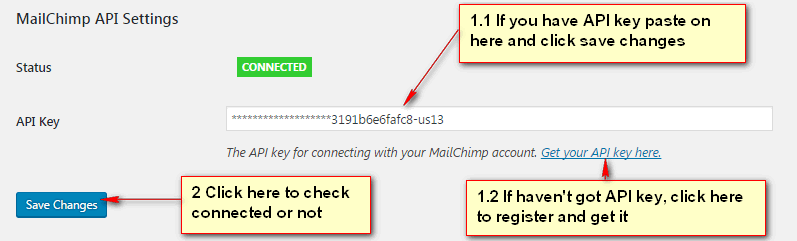
Add your API Key
Step 3 - Once the API key is added and the changes saved, your list information will populate in the "MailChimp Data" area.
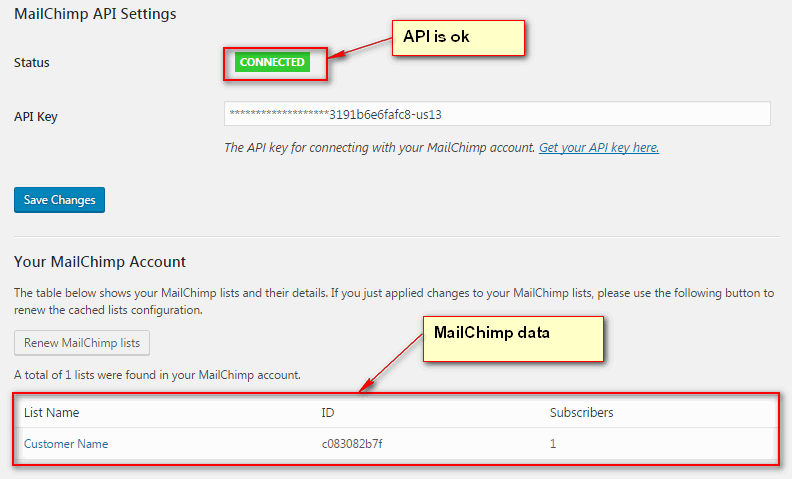
Your MailChimp data
Step 4 - Forms Settings
Access to Form settings
Step 5 - Click MailChimp for WP → Forms, you can create and customize the HTML for the signup form to place within your Wordpress site.

Customize Signup form
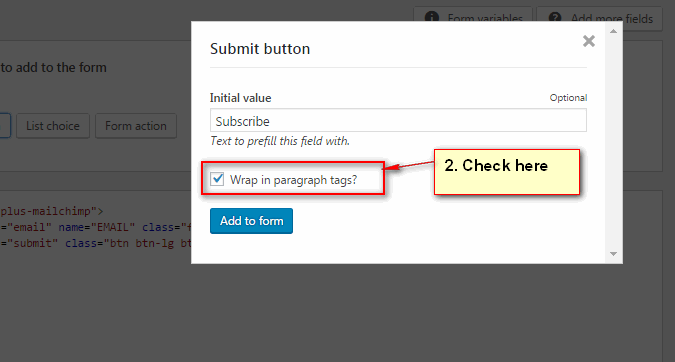
Checkbox Wrapp in paragraph tags
Step 6 - Adjust messages shown when a form submission is complete as well as any error messaging.
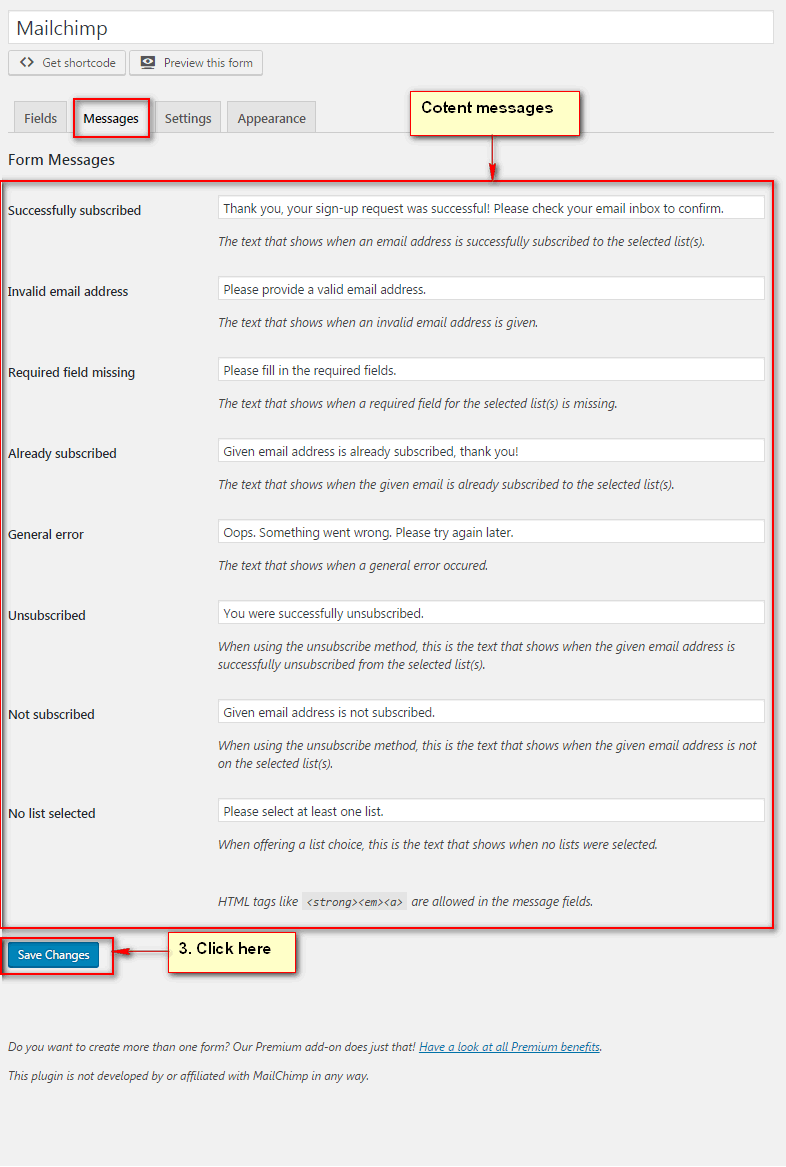
Insert status messenger