This is step by step guide on how to build home page manually for HOME 1
Note: You need Wordpress, APRIL theme & all required plugins are already. Building other homepages process are similar.
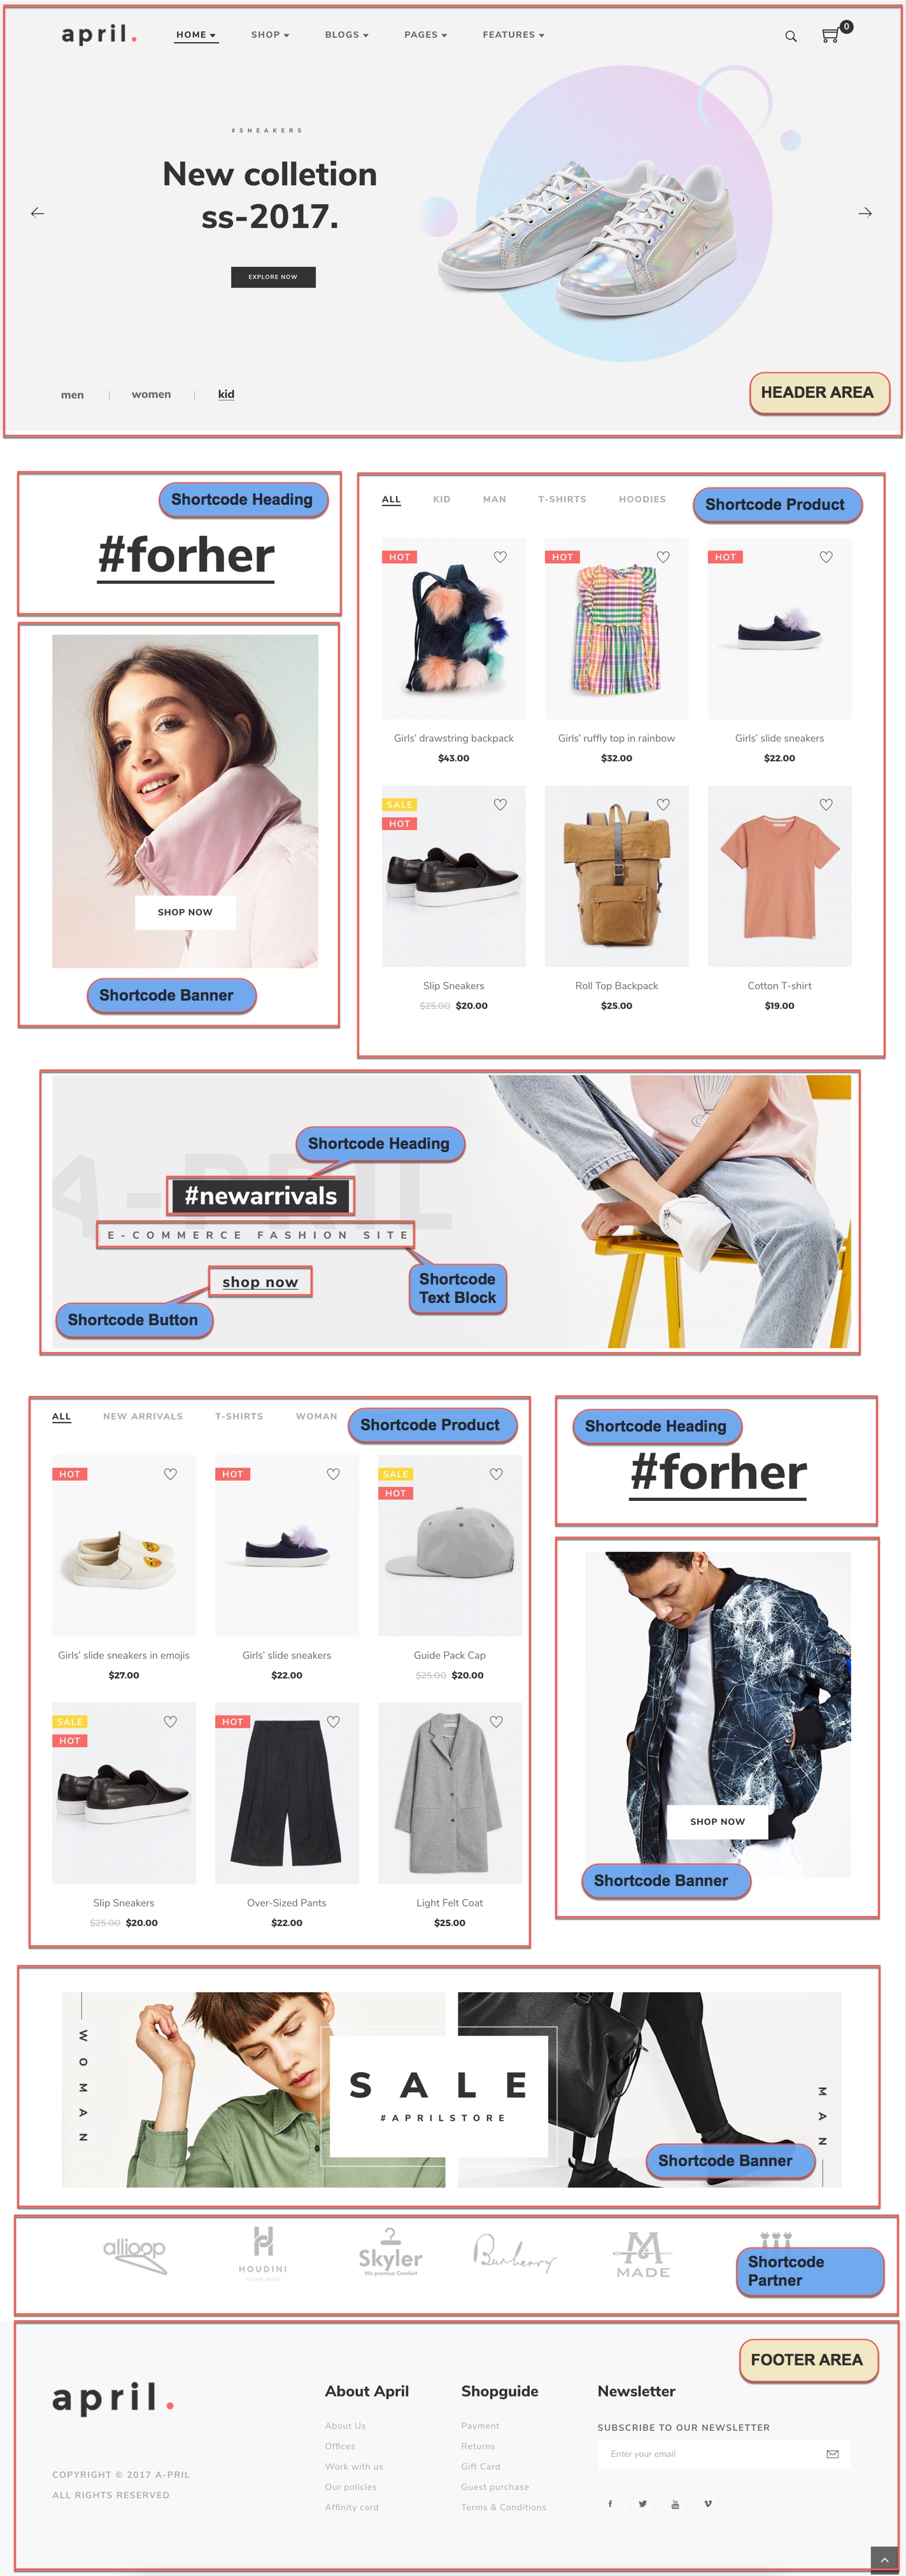
Overview elements area on page
Building
Building header area
You can setup options in Theme Options (which will affect to entire website) or create a new Preset and apply to any page. Please consult this video guide on How to build Header Area. This process is similar to building Header Area on april theme.
The screenshot below is an header area:
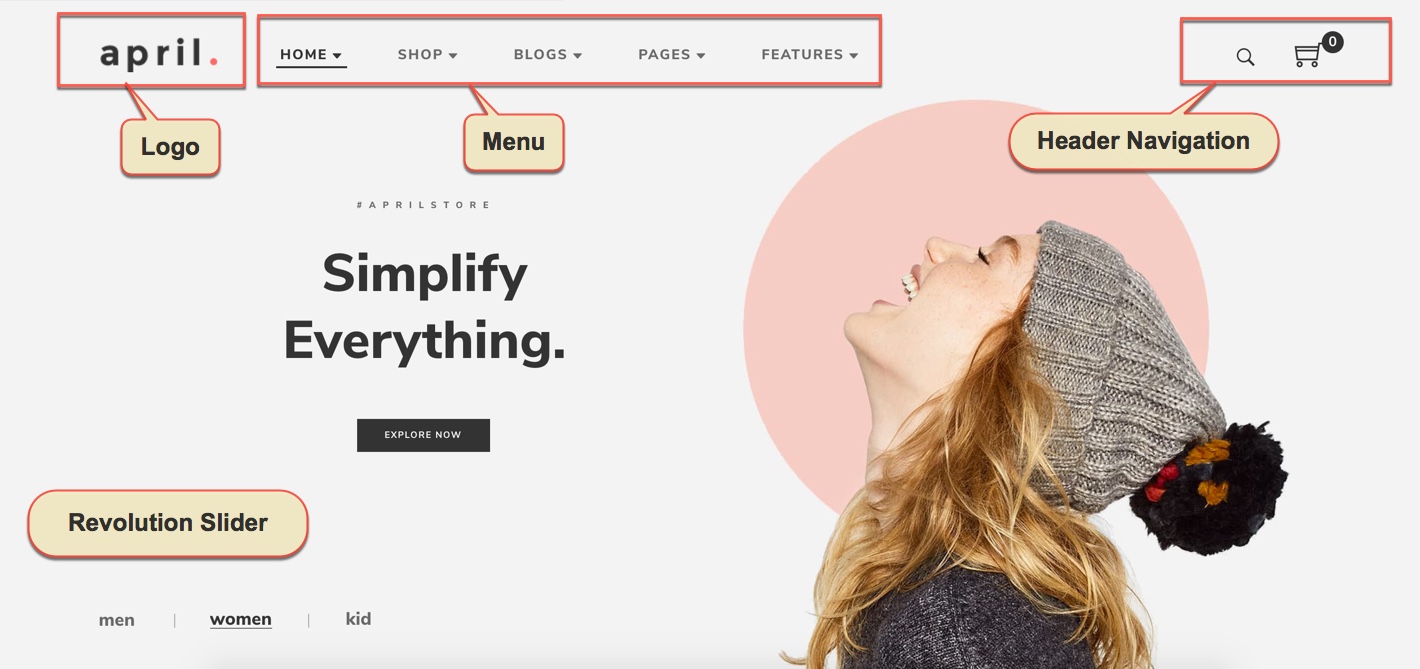
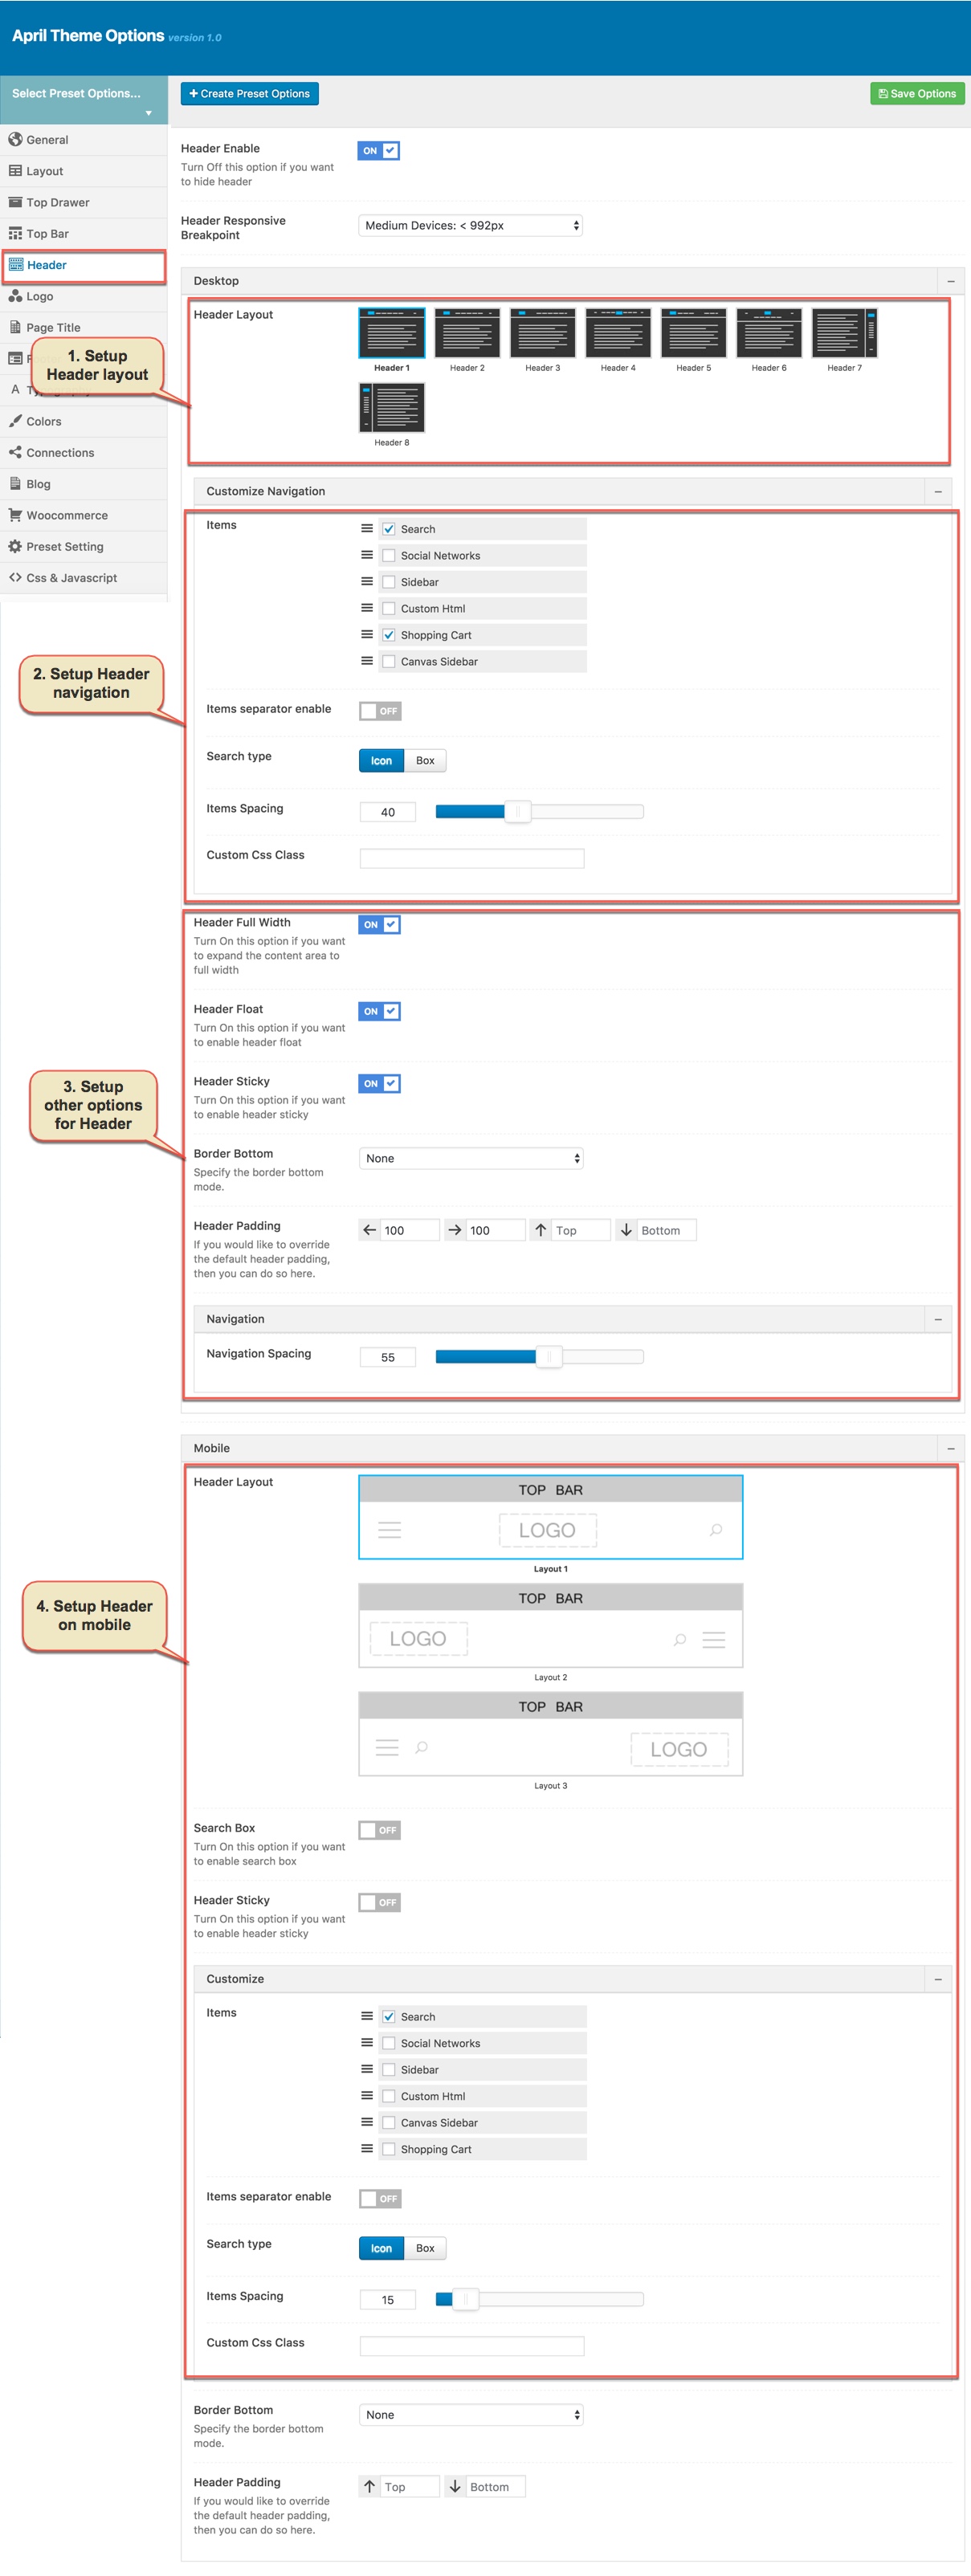
Go to Theme Options → Header tab, then setup options for Header Area as your liking
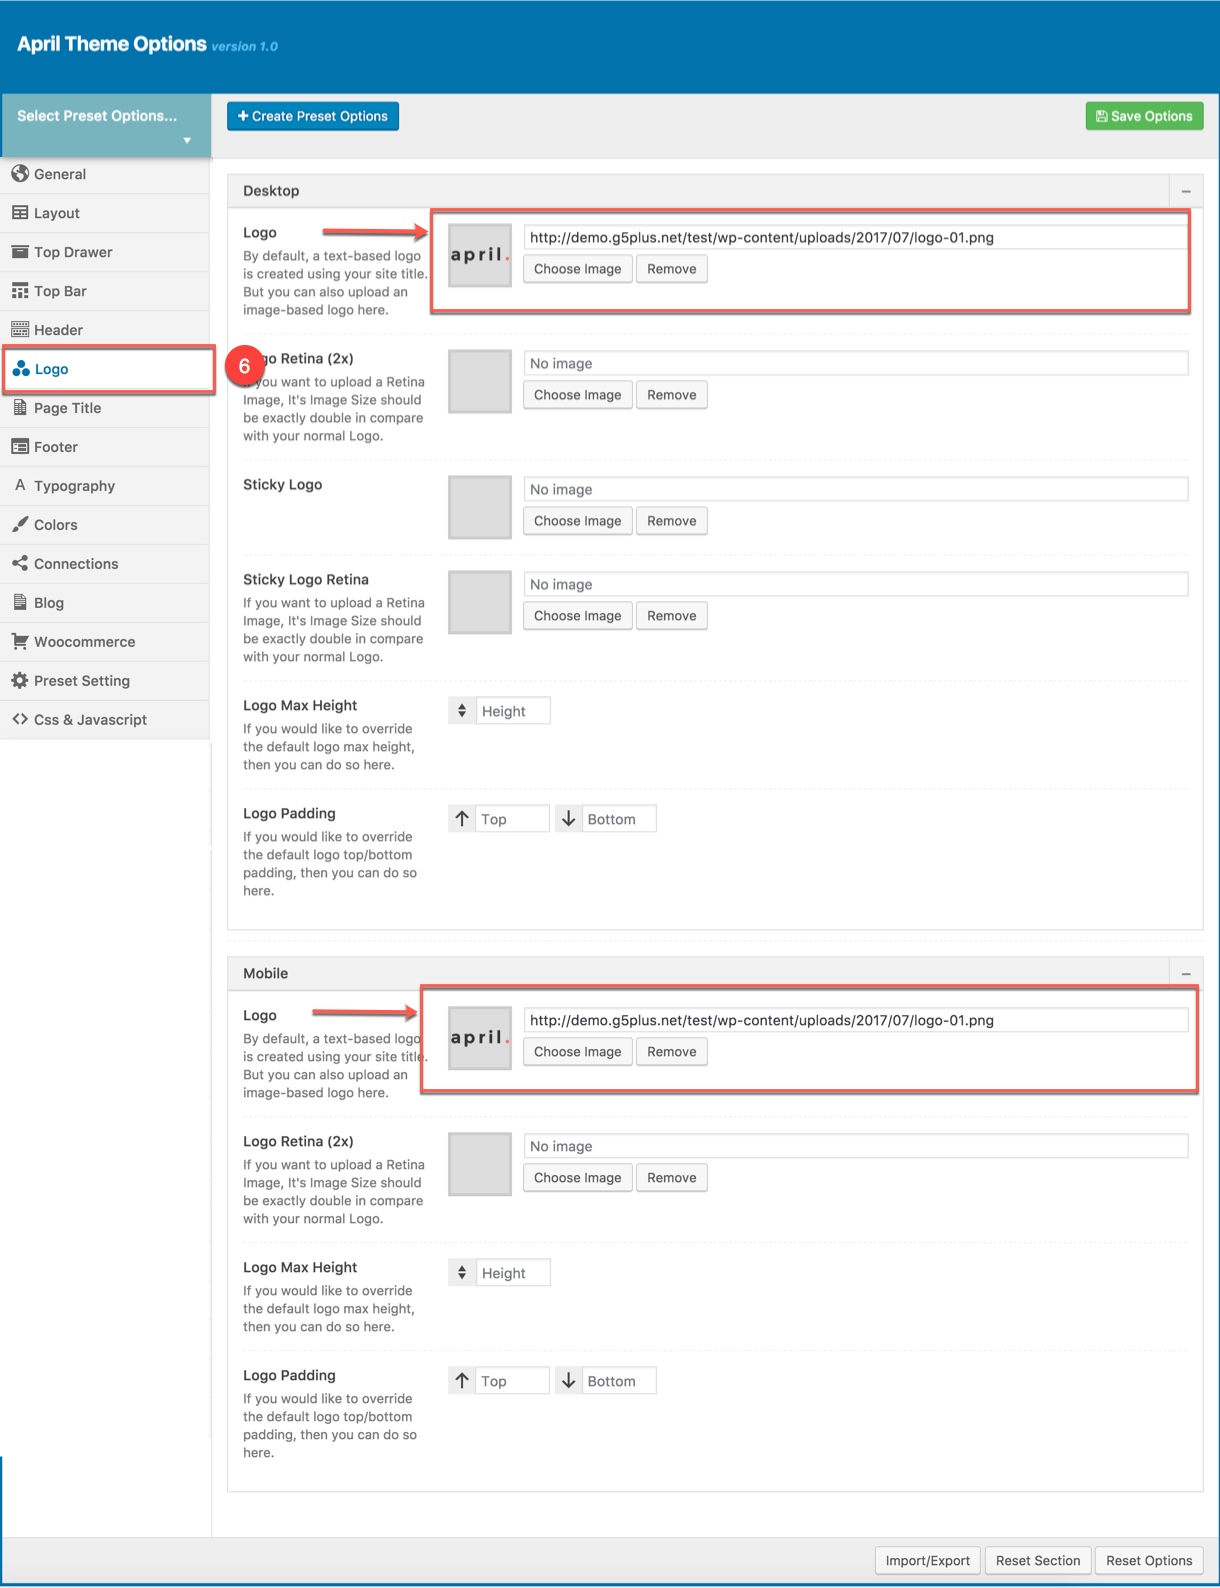
Go to Theme Options → Logo tab, then change logo (please read detailed description below each item before upload):
The menu is one of the most important elements of the site. It provides your visitors with the information about site structure. If your menu has well-thought and conveniently grouped elements, you visitors will be able to find the needed section easily.
Navigate to Apperance → Menus section to manage all menus on your site and do follow as below screenshot:
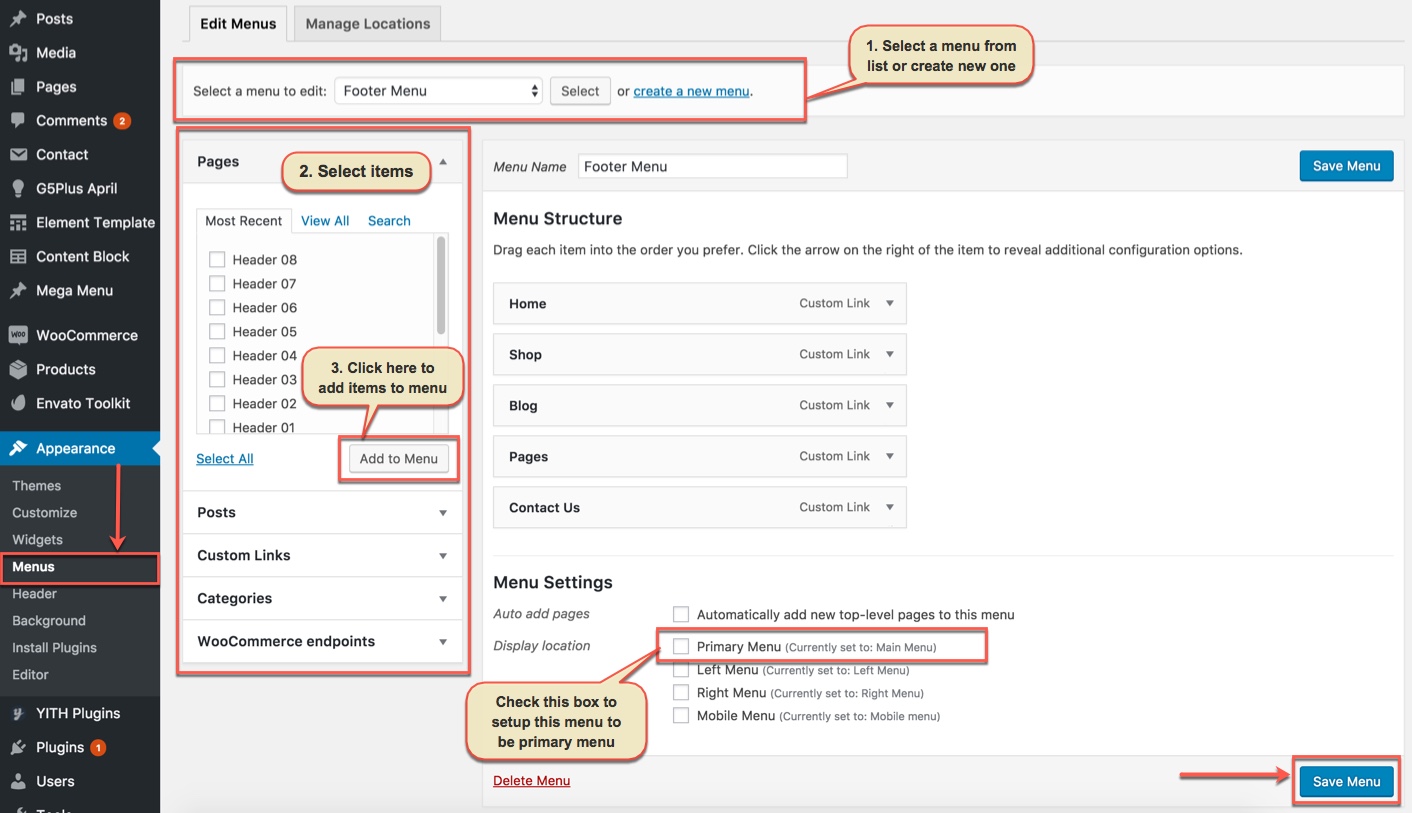
In the Menu Settings section, click to Primary Menu to setup this menu to be the main site menu and is used almost in all header styles and menu locations.
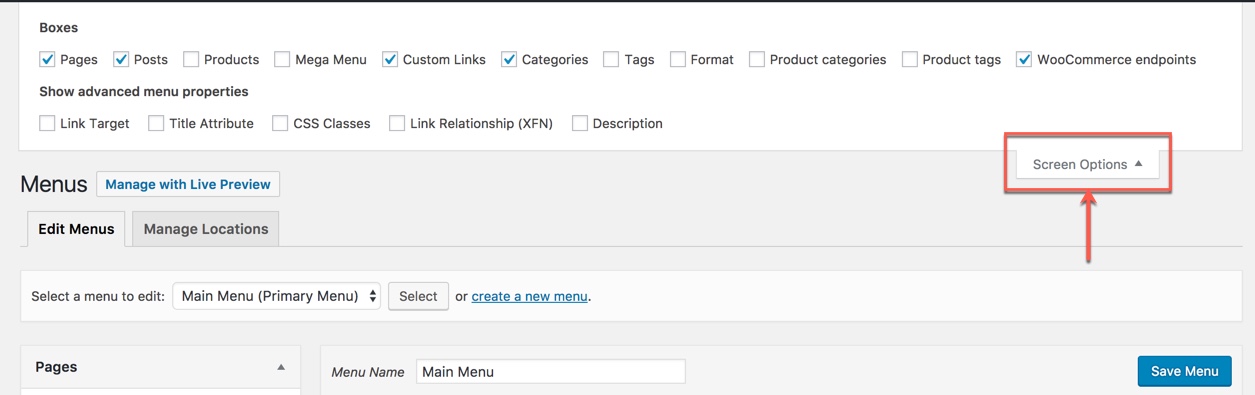
If you want to extra more fields to add to your menu, you can click on Screen Options and select:
Finally, don't forget to Save Menu after everything is set properly and check it on the site. You can also consult Mega Menu section to build an attractive menu by your own.
Building footer area
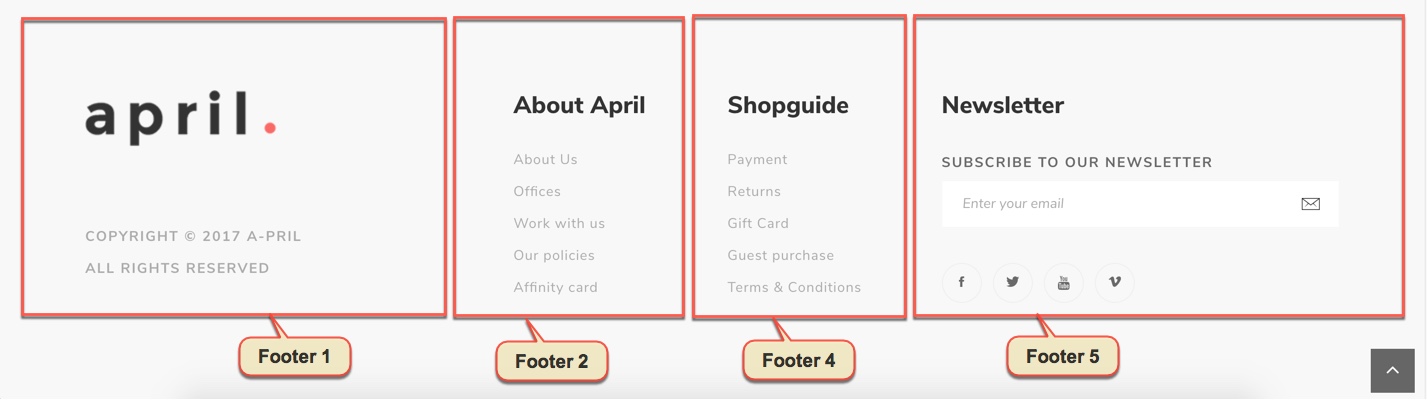
The screenshot below is demo Footer Area on the frontend
Go to Widget Manager
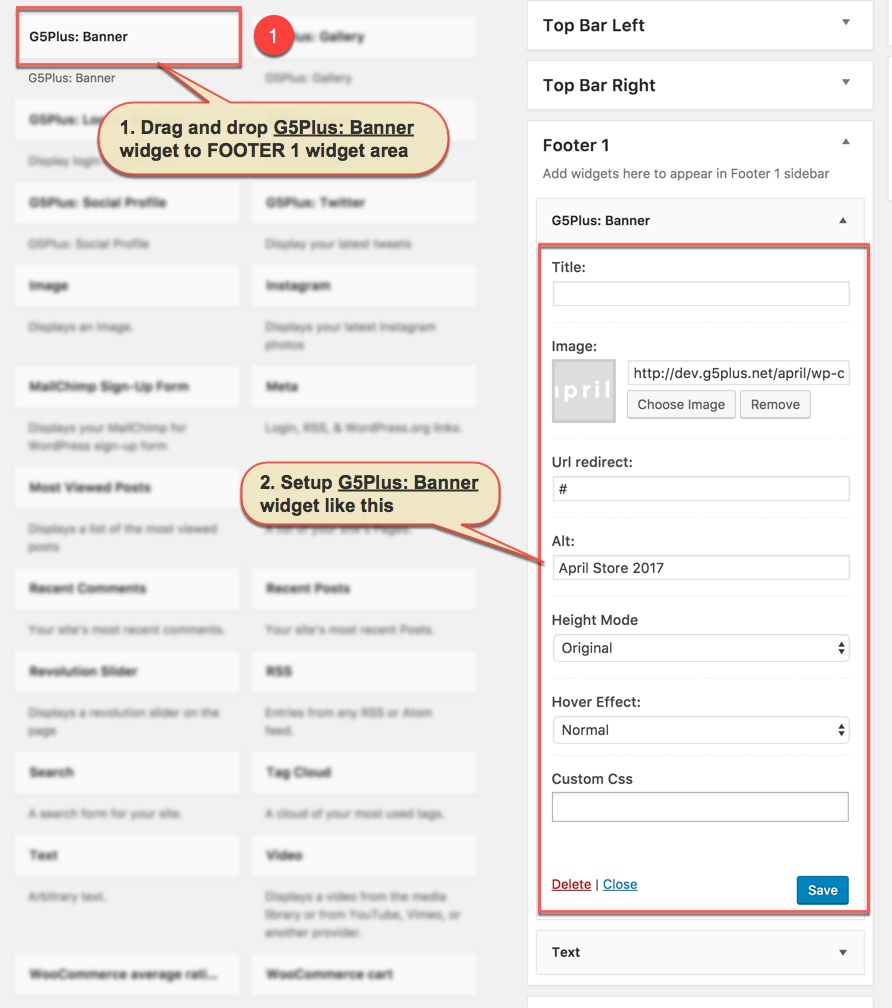
Add G5Plus: Banner widget and Text widget to Footer 1 area
1. Add G5Plus: Banner widget to Footer 1 area and setup as below:
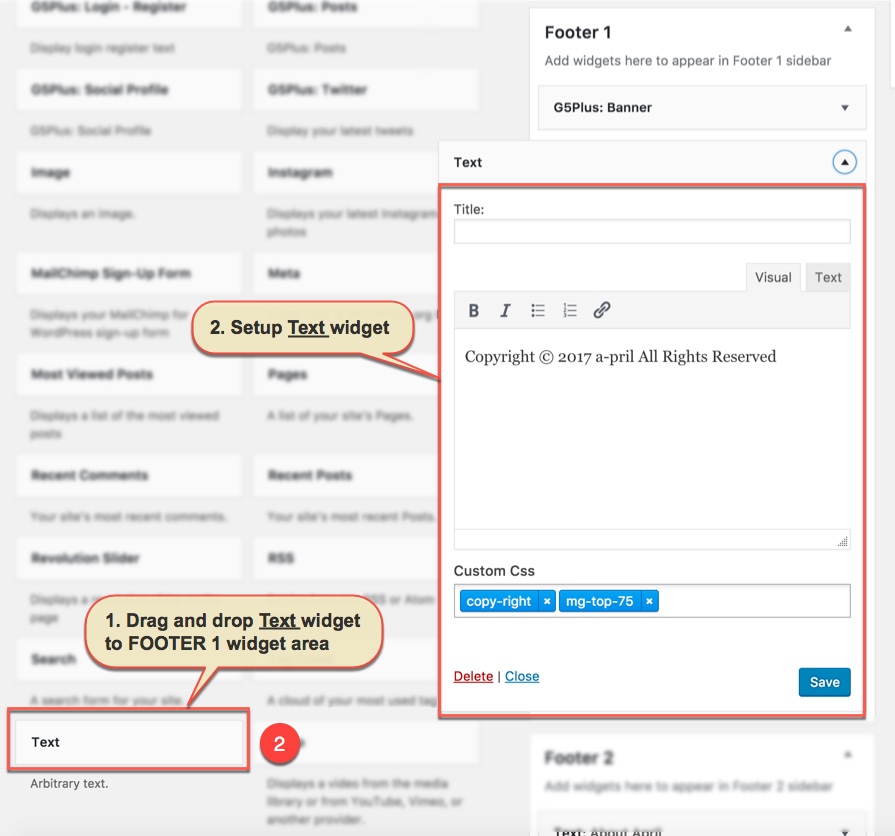
2. Add Text widget to Footer 1 area and setup as below:
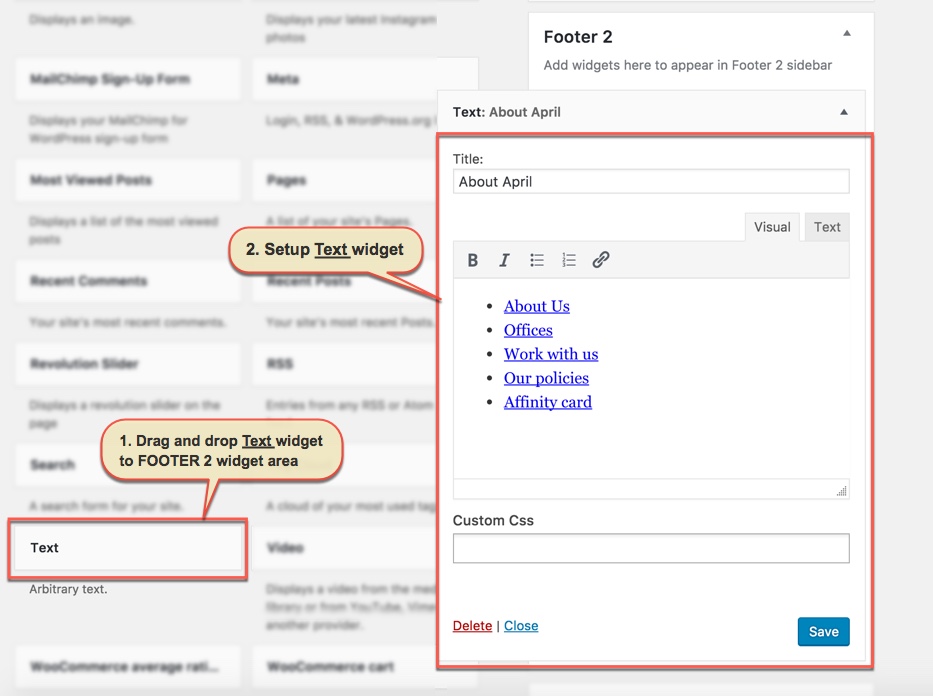
Add Text widget to FOOTER 2 widget area
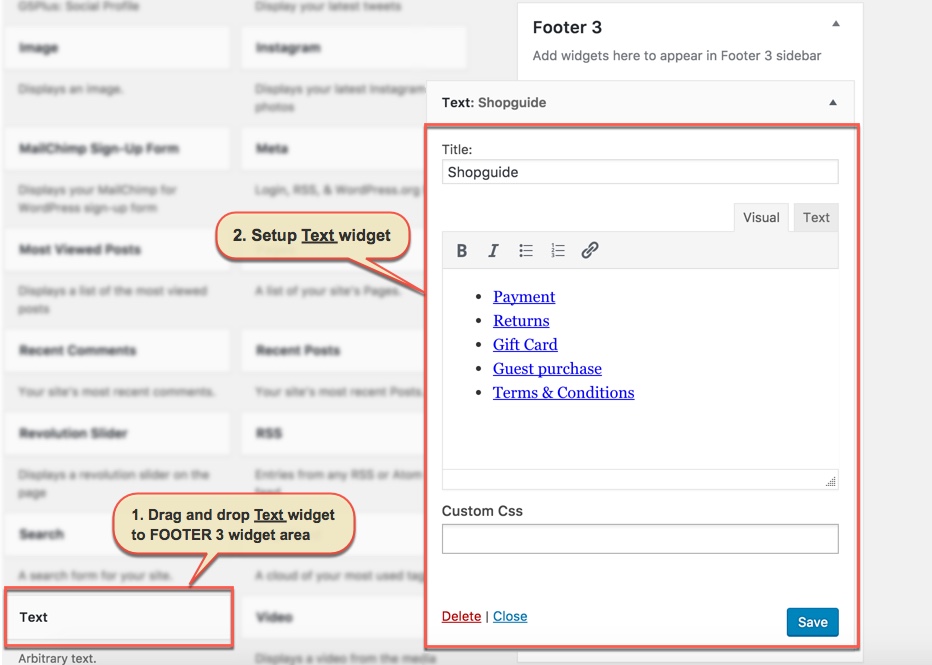
Similar to FOOTER 2 widget area, we add Text widget to FOOTER 3 widget area:
Add Custom HTML widget and G5Plus: Social Profile widget to Footer 4 area
1. Add Custom HTML widget:
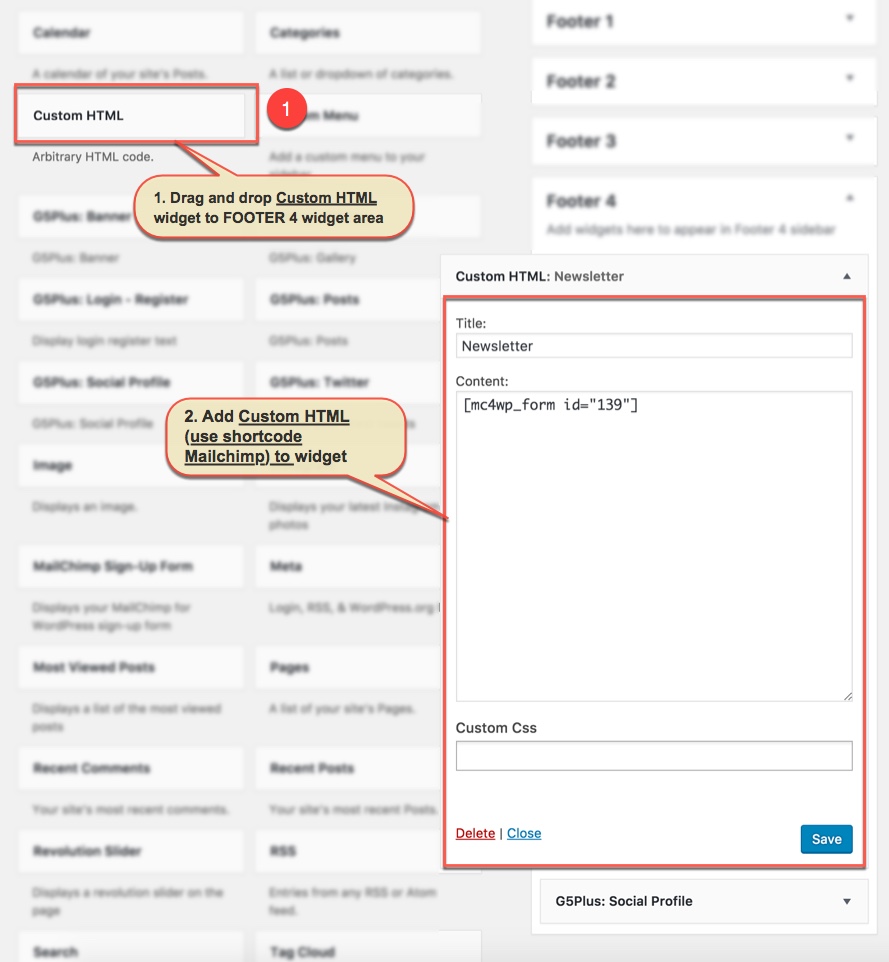
We use shortcode of Mailchimp form to add to Custom HTML widget. Please consult Mailchimp Settings section for more details about this shortcode.
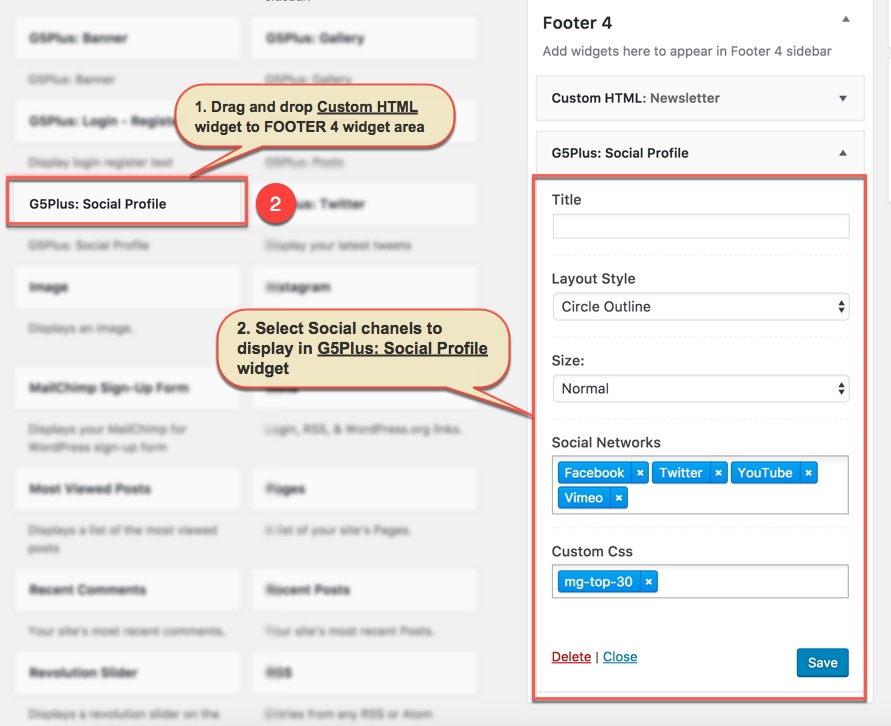
2. Add G5Plus: Social Profile widget:
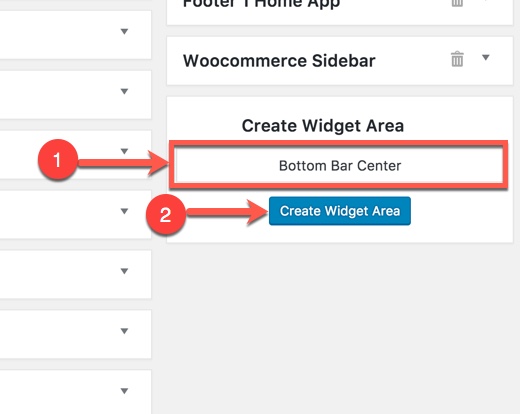
Notice: You can create a new widget simply like this:
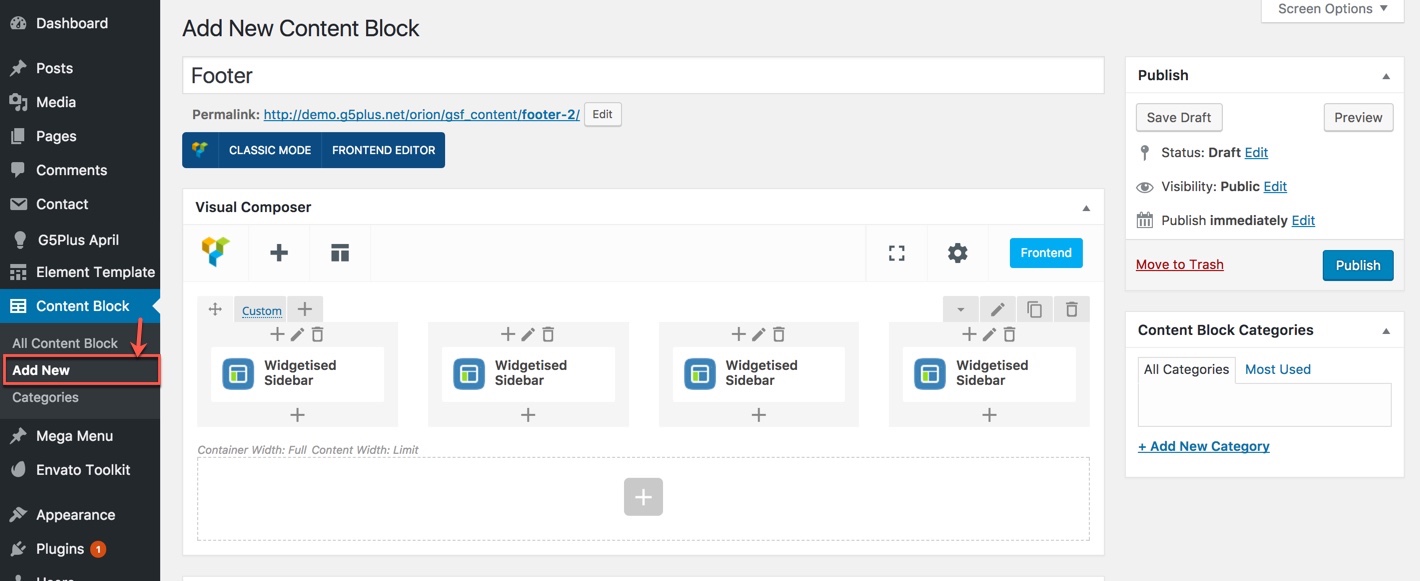
Use Widgetised Sidebar in Visual Composer to build Content Block and apply to Footer area.
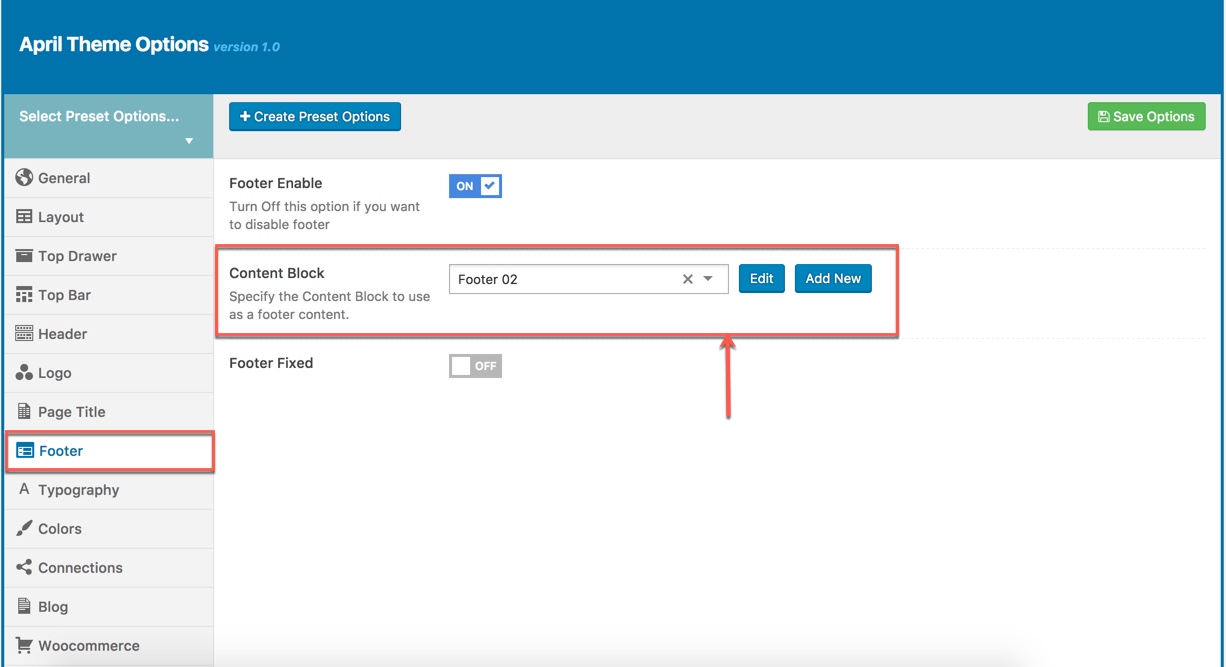
Specify the Content Block to use as a footer content in Theme Options
Go to Theme Options → Footer tab, then setup general options for Footer area and specify the Content Block to use as a footer content.