Config row / column
Content management is a breeze with Fortuna and it requires absolutely no coding skills. Using a highly customized version of the Visual Composer plugin the theme offers a user friendly Drag'n'Drop interface for easy page creation and editing. Follow these simple steps to create a Page with april:
Step 1: Go to Pages → Add new in your Dashboard. Add a Title to your Page (top field).
Step 2: Switch to Backend Editor if you are currently under Classic Mode (button below Title field).
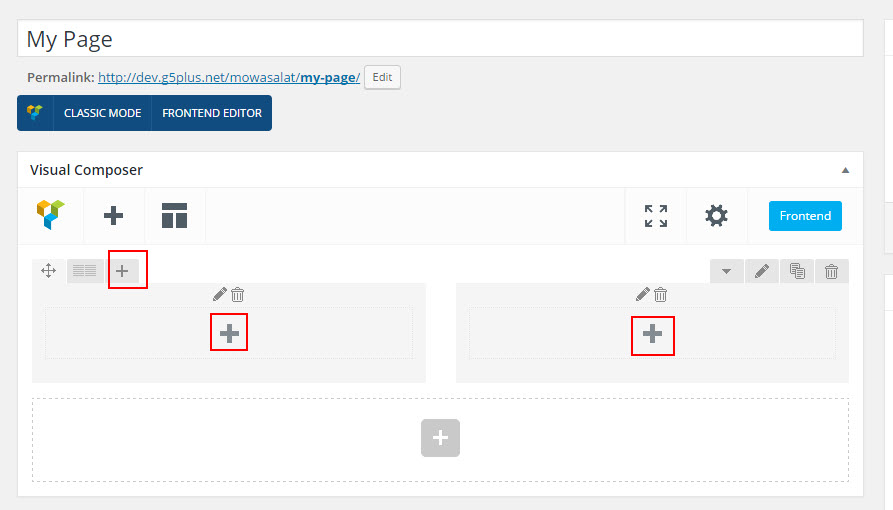
Step 3: Start adding page content by clicking on the Plus button or Add Element.
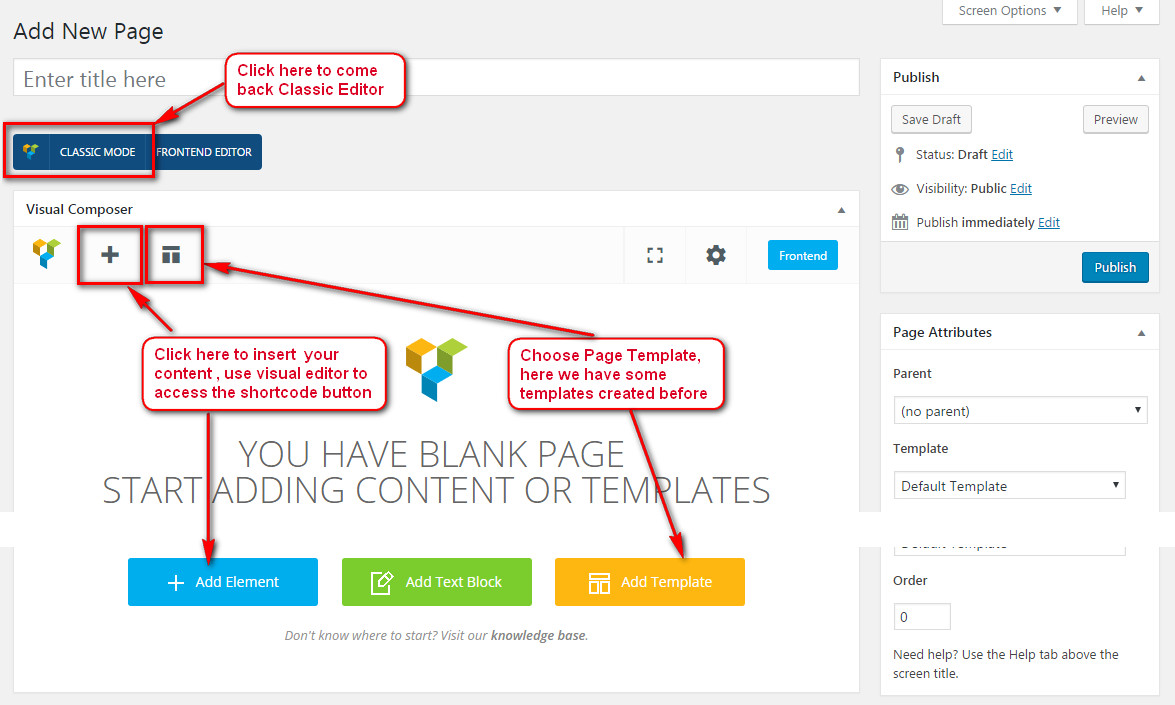
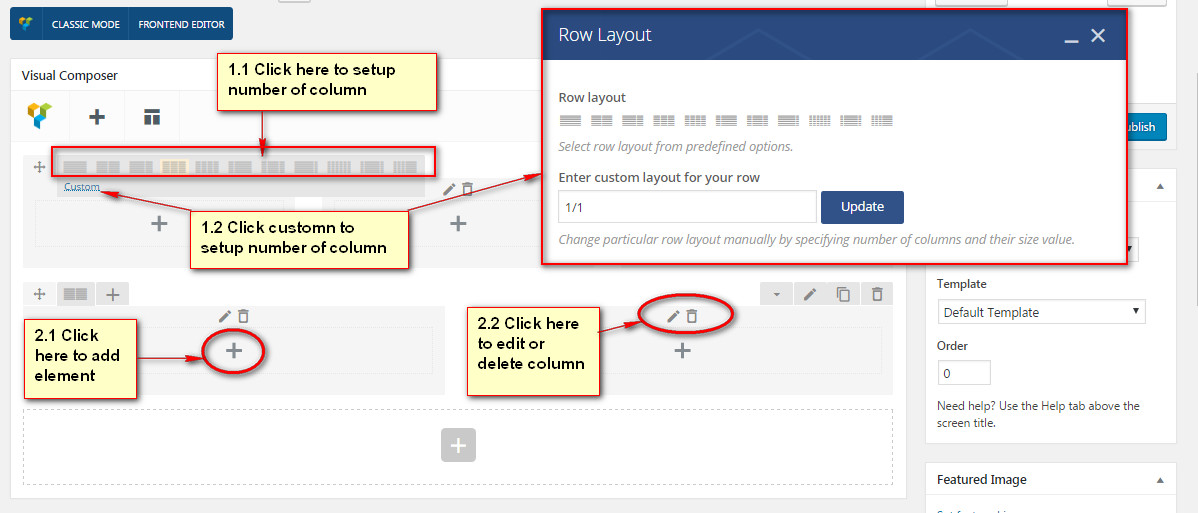
Step 4: The Add Element Popup appears, click on the first element in order to add a new Row to your page. A Row is a main building block of a page, you can split your Rows into Columns, place various elements into your rows, set Row Backgrounds, effects etc.
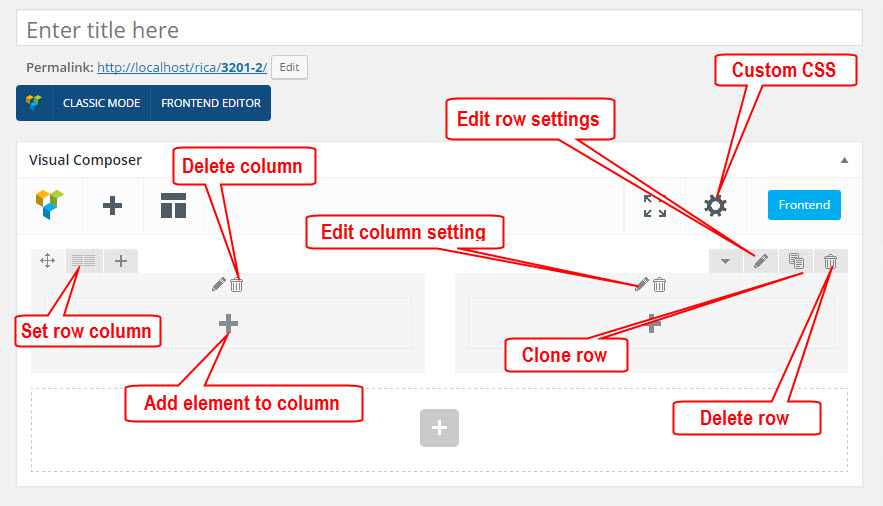
Step 5: Once you have the new Row added to your page you can split that Row into Columns in order to StartUpe elements nicely in it. Once you split your Row into column you can start adding different Page Elements into your columns. If you want to edit your Row/Column Settings click on the small Pen icon (top right corner of the Row/Column). You can also Duplicate your Row with the Icon (duplicate icon) next to it or Raprilve the Row/Column with the icon to the right (trash bin icon).
Row settings (General)
Click on the Edit Row button (Pen icon, top right of the Row). You will see the Row Settings Dialog popup.

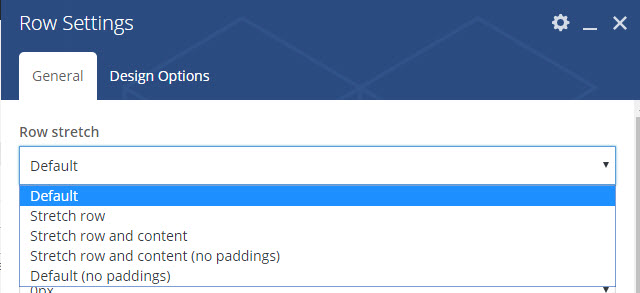
Default - Row will full width (option default)
Stretch row - Row will full width, visible content if overflow
Stretch row and content - Max width 1170px and center.
Stretch row and content (no paddings) - Full width, padding left and padding right 15px.
Default(no paddings) - Full width, padding left and padding right 0px.
In order to control gaps between columns navigate to row parameter window and change column gap option - the gap will be introduced between all columns within this row. Default value of gap is set to 0.
Important: In case of mobile stacking gap will be introduced between stacked columns as well.
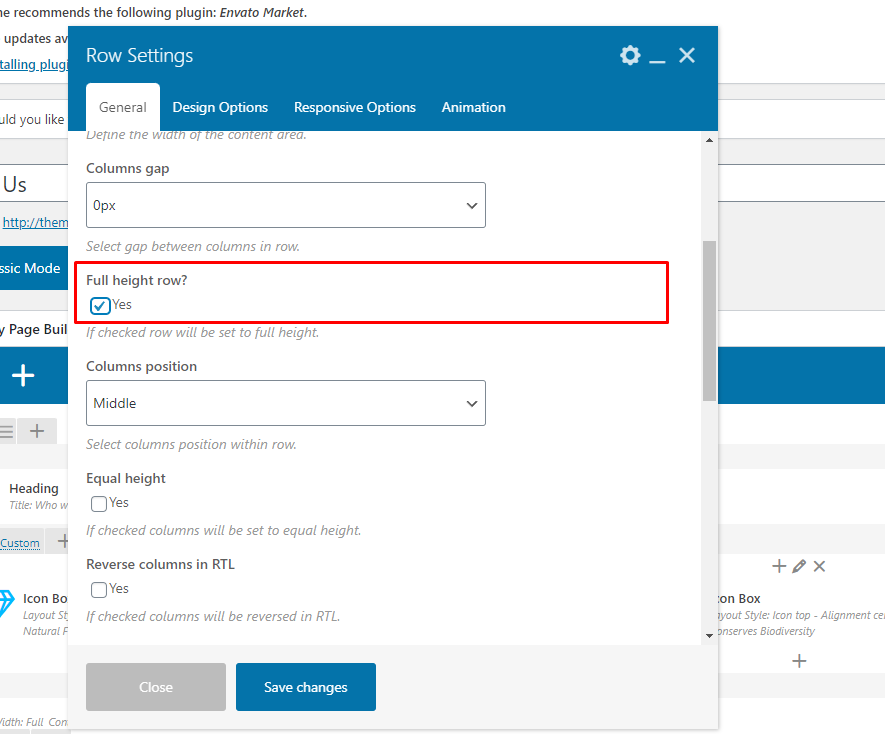
In order to set columns within row to be equal height you must navigate to row parameter window and check Equal height option to be active. All columns within this row will have equal height and align to the longest column.
In order to control vertical alignment of content within rows/columns navigate to row parameter window and select position of content - top, middle or bottom. By default value is set to "Default" meaning it will use Top or any other alternative if defined within your WP theme.
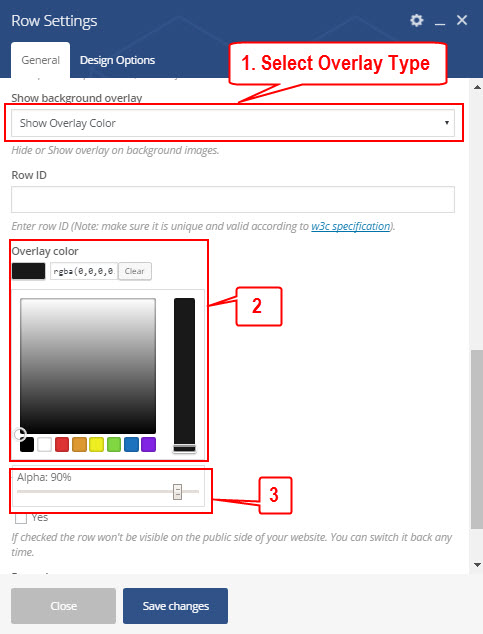
Step 1: - Select Overlay Type
Step 2: - Click button to select color of background overlay
Step 3: - Set opacity for overlay (0 → 100)
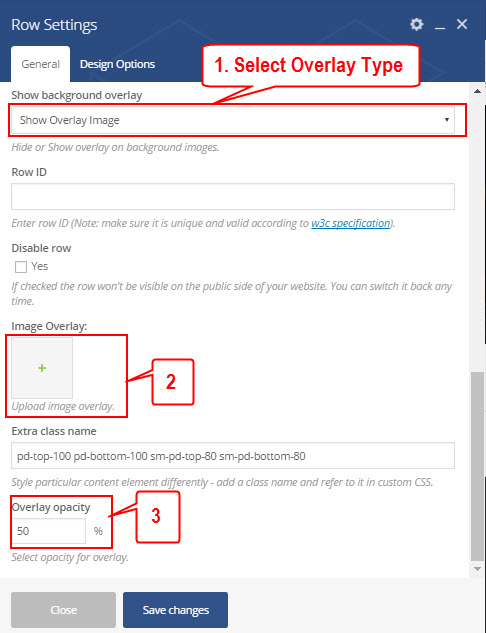
Step 1: - Select Overlay Type
Step 2: - Click button to select image or set background image from Design Options
Step 3: - Set opacity for overlay (0 → 100)
Set ID of row (Note: make sure it is unique and valid according to w3c specification)
Once you have the desired number of columns in a Row you can manage each Column's individual settings by clicking on the Toolbar icons of that specific Column. The Plus Icon adds an element to the top of the Column, the bottom Plus Icon adds an elemnt to the bottom of the Column. The Trash Bin icon raprilves the Column. Access the Column Settings by clicking on the Pen Icon.
Add / edit page elements
Adding Page Elements to your Page is pretty straightforward. First you need to have created a new page, added a Row to it and defined your Row Columns (read more in the previous section).
Step 1: Click on one of the Plus Icons within the column you want to add a new element to.
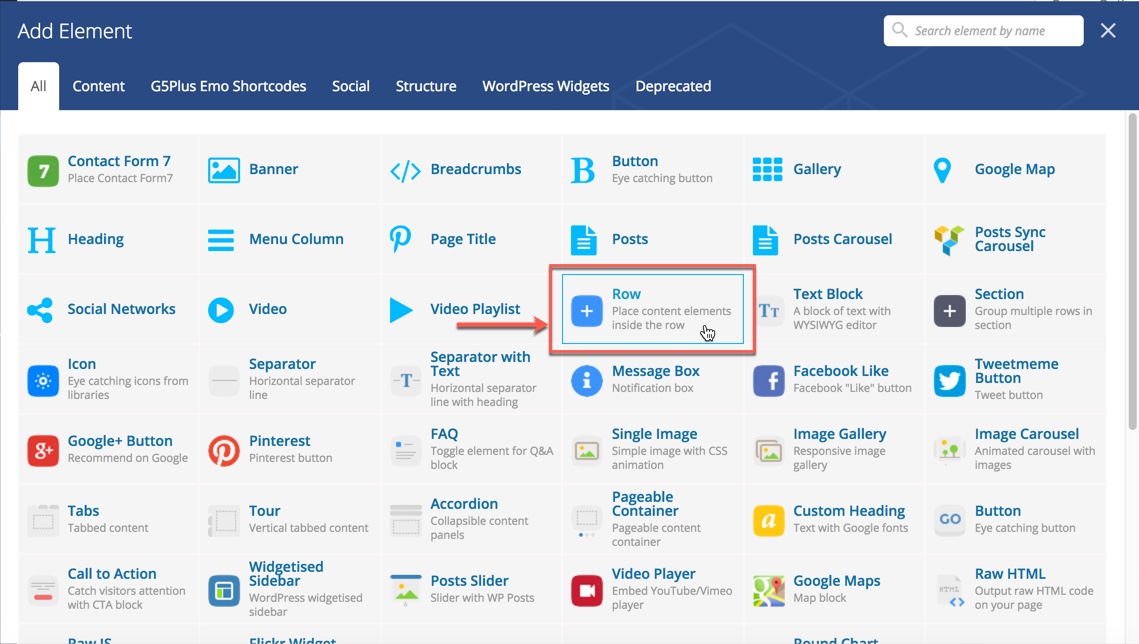
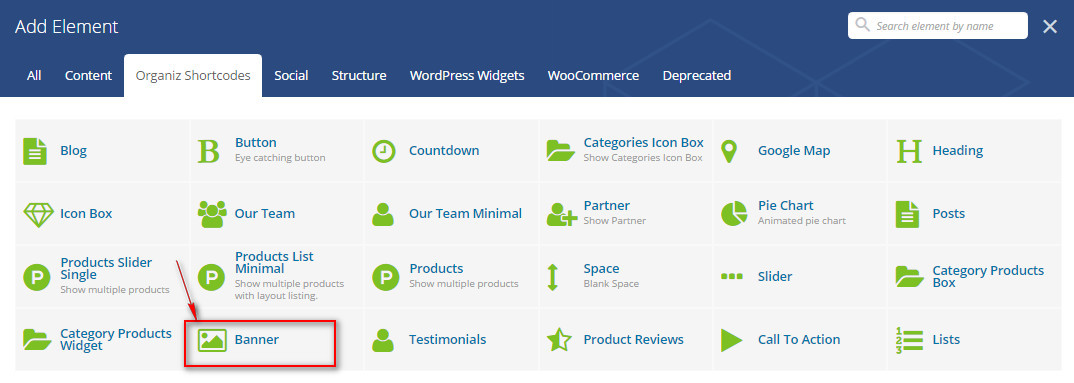
Step 2: The Page Elements dialog will appear, click on the element you want to add to your Column/Row.
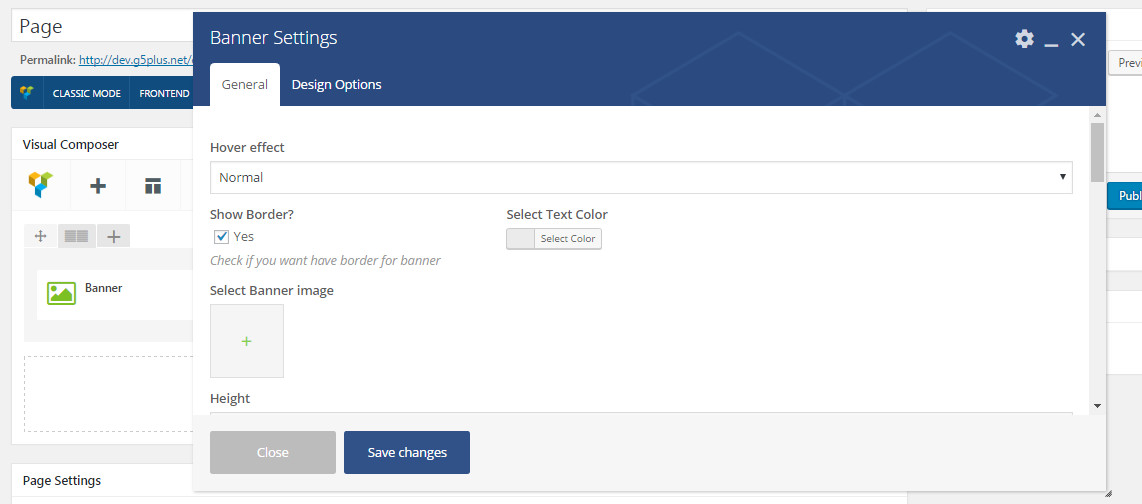
Step 3: The Element Settings Dialog of the Element you are adding appears. Customize your element anyway you want, then click Save.
Step 4: Your element is now in the Column you added it to. Once you hover your newly added element you will see a small popup that let's you manage it. You can do the following with your elements:
Step 4:Your element is now in the Column you added it to. Once you hover your newly added element you will see a small popup that let's you manage it. You can do the following with your elements:
Edit - Click on the Pen Icon to edit your Element's properties.
Clone - Click on the Copy Icon to duplicate your Element.
Delete - Click on the Trash Bin Icon to raprilve your Element.