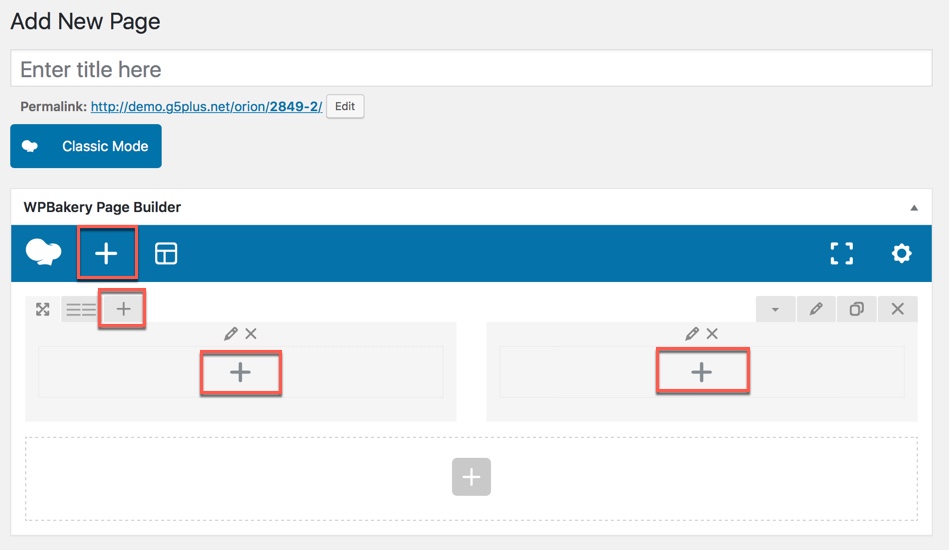
Adding Page Elements to your Page is pretty straightforward. First you need to have created a new page, added a Row to it and defined your Row Columns (read more in the previous section).
Step 1:Click on one of the Plus Icons within the column you want to add a new element to.
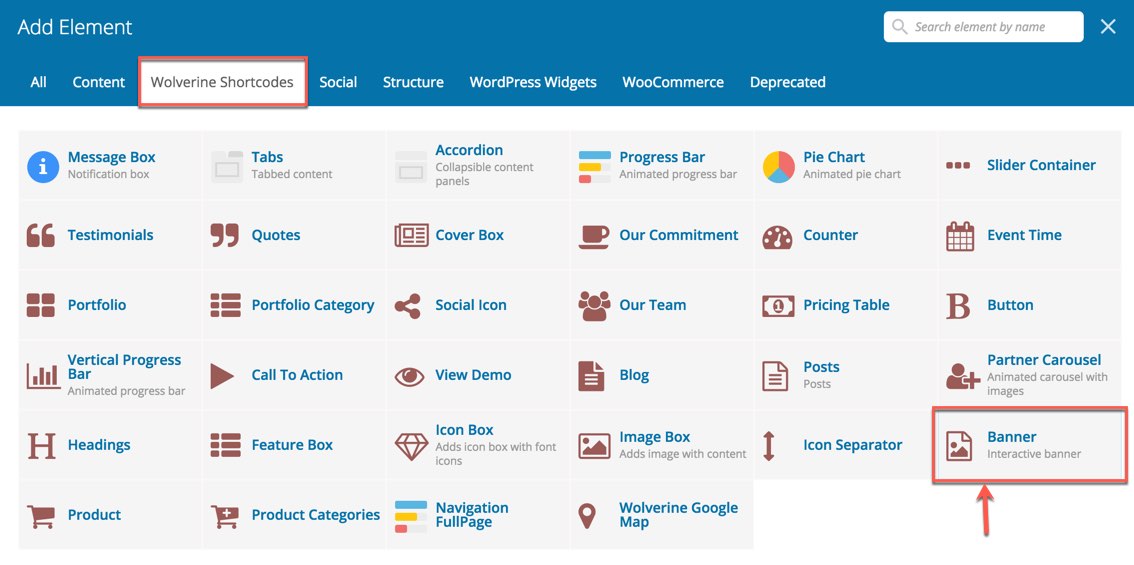
Step 2:The Page Elements dialog will appear, click on the element you want to add to your Column/Row.
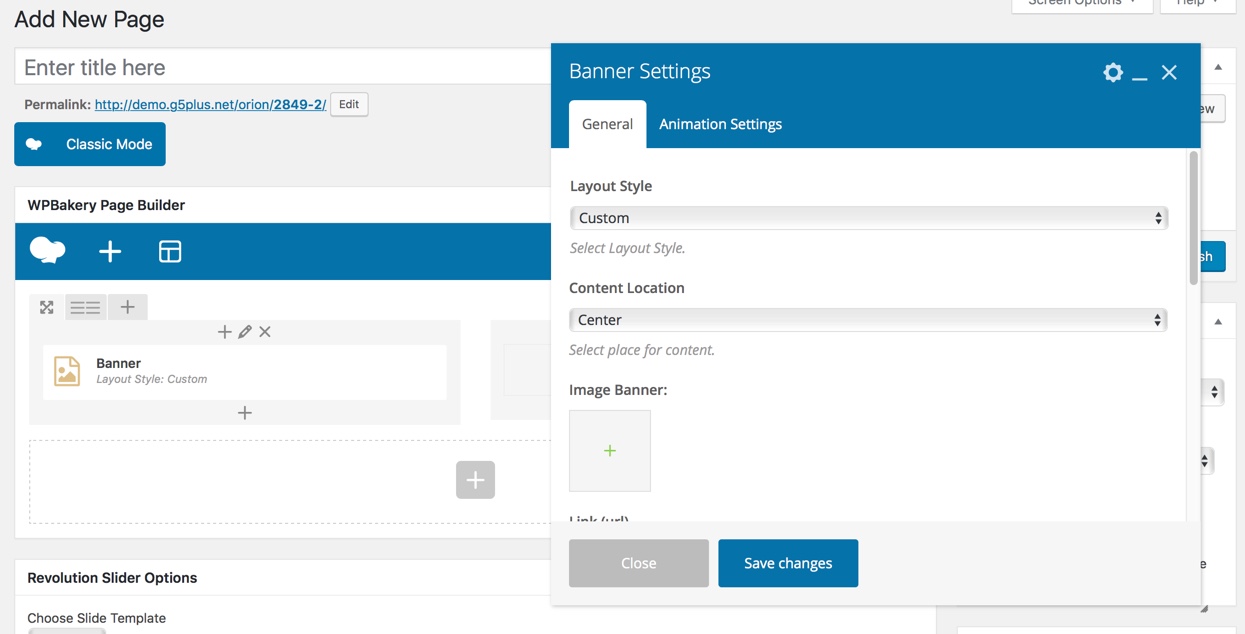
Step 3:The Element Settings Dialog of the Element you are adding appears. Customize your element anyway you want, then click Save.
Step 4:Your element is now in the Column you added it to. Once you hover your newly added element you will see a small popup that let's you manage it. You can do the following with your elements:
Move - Drag your element via the Direction Icon to move it around within the Column,Row or Page.
Edit - Click on the Pen Icon to edit your Element's properties.
Clone - Click on the Copy Icon to duplicate your Element.
Delete - Click on the Trash Bin Icon to remove your Element.
![]()