MENU SETTINGS
The menu is one of the most important elements of the site. It provides your visitors with the information about site structure. If your menu has well-thought and conveniently grouped elements, you visitors will be able to find the needed section easily.
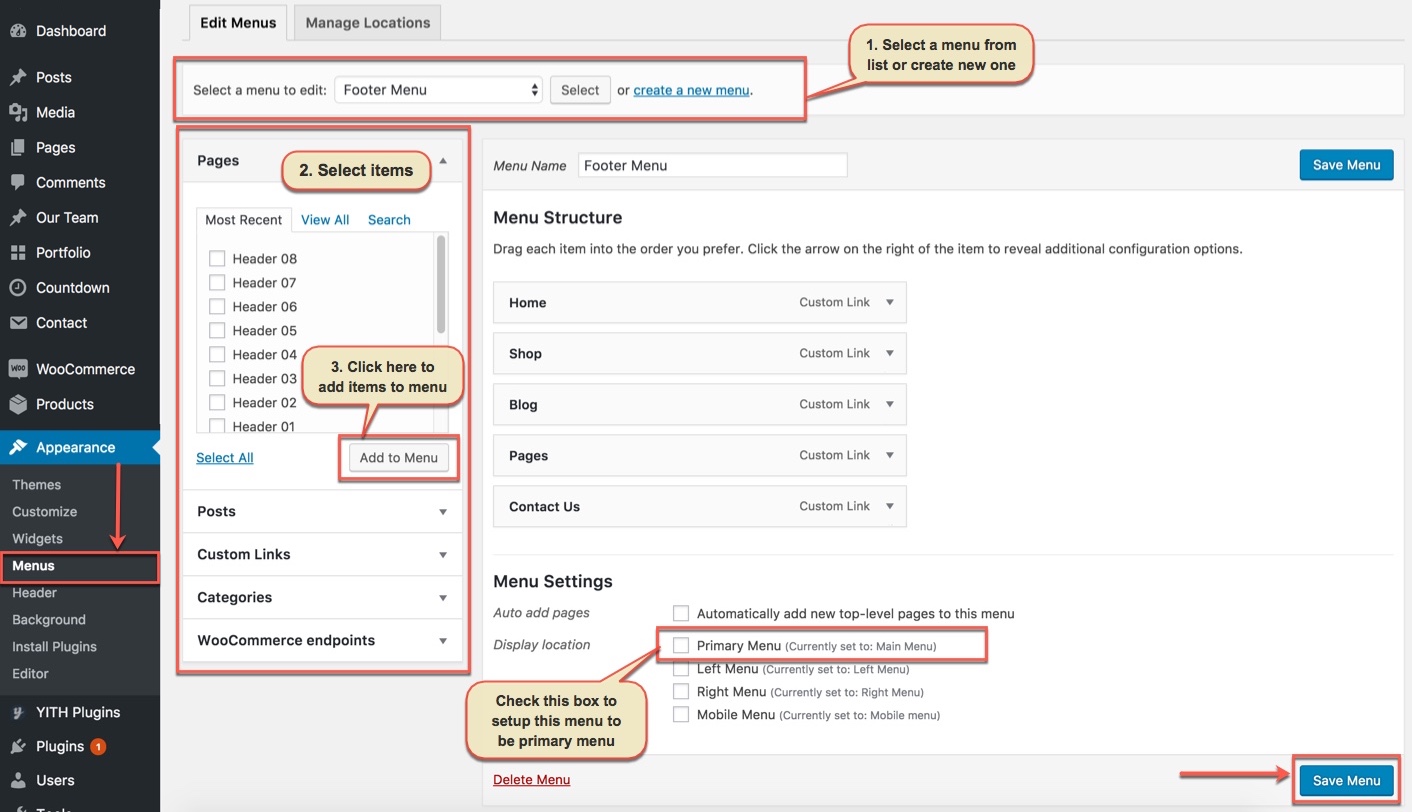
Navigate to Appearance → Menus section to manage all menus on your site and do follow as below screenshot:
Setting up menus for Darnatheme is no different than ordinary menu setup in WordPress, however, we provide added a lot of options for customizing menus. We use XMENU per menu item that you can customize them to bring your menus to new level!
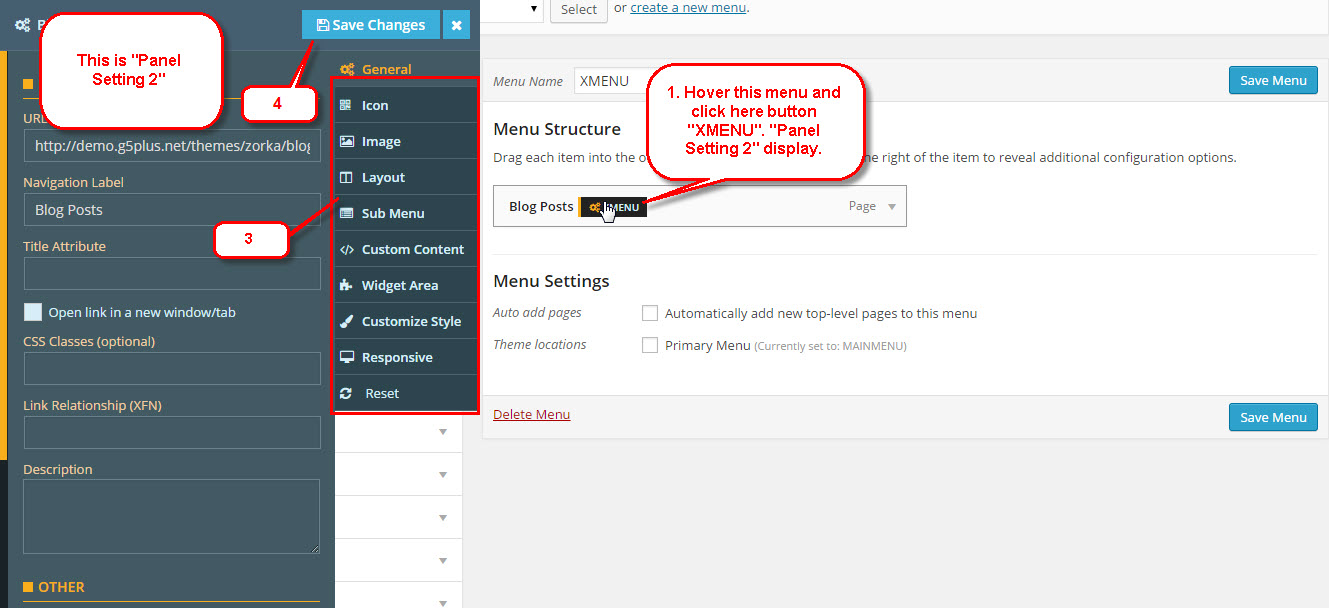
To configure settings for individual menu items or submenus, hover over the menu item you want to configure, and click the XMENU button that appears. The Menu Item Settings Panel will display from left.
These settings control a specific menu item, with options including:
- General link settings
- Icon & position
- Image (source, size, etc)
- Item layout(width, content alignment, padding, etc)
- Submenu (type, width, custom width, position, child item default width, sub menu animation, etc)
Click the tabs on the right "Panel Setting 2"(3) to access the various panels of settings. Click the "Save Changes"(4) button at the top to save settings for this specific item. To configure a Submenu, click on the parent item for that submenu and then click the Submenu tab on the right.
Please visit Document XMENU and video guide on How to Assign XMenu to your theme(ex: ZORKA) for further details.
In the Menu Settings section, click to Primary Menu to setup this menu to be the main site menu and is used almost in all header styles and menu locations.
If you want to extra more fields to add to your menu, you can click on Screen Options and select:
Finally, don't forget to Save Menu after everything is set properly and check it on the site.


