System requires
Here, we outline all types of necessary information, and provide you with all the essential details you require for using Stanley theme. Stanley can only be used with WordPress and we presume that you already have WordPress installed and ready to go. Please ensure that you are running WordPress 5.4 or higher, PHP7.2 or higher, and MySQL 5 or higher. We have tested it with Mac, Windows and Linux. Below is a list of items you should ensure your host can comply with.
Recommended PHP Configuration Limits
- memory_limit = 256M
- max_execution_time = 300
- max_input_time = 300
- upload_max_filesize = 64M
- post_max_size = 64M
Many issues that you may run into such as: white screen, demo content fails when importing, empty page content and other similar issues are all related to low PHP configuration limits. The solution is to increase the PHP limits. You can do this on your own, or contact your web host and ask them to increase those limits to a minimum as our requires
Please consult Check System Status section to make sure your server is set up properly and the theme and content will be loaded correctly. Enough server configuration will also ensure fast speed and increase performance.
Blank screen after installing or when trying to activate the theme
Fatal error: Allowed memory size of xxxxxx bytes exhausted
You can also consult Troubleshooting articles here for finding out a solution for your issue related to low PHP limits.
Download theme
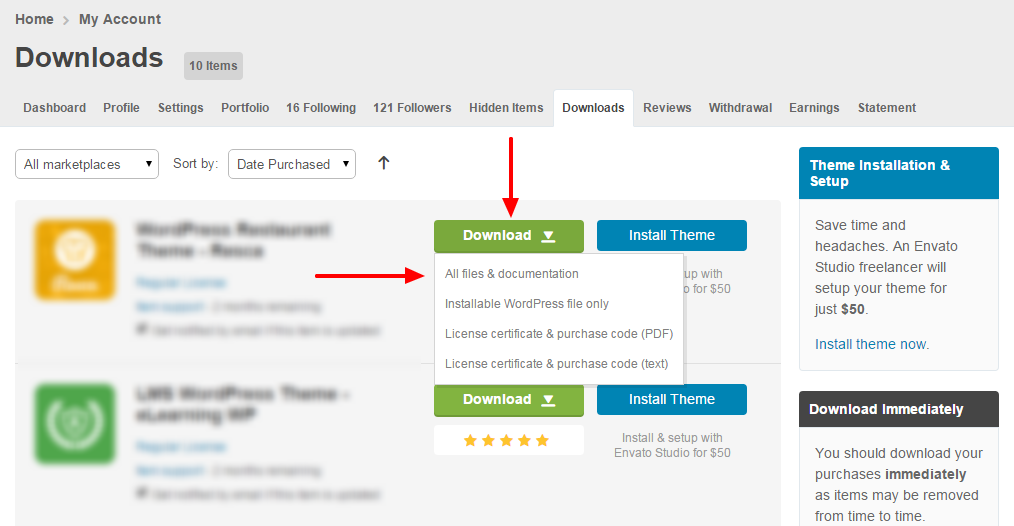
Navigate to Themeforest account and access at Downloads page in the profile. You’ll see the Download button in front of Stanley theme. After you click it, you’ll get the options to download all files in zip-archive, licenses and purchase code, or installable pack only (We would recommend you to install all files of the theme).
Please, unzip the archive on your computer. you’ll get zip file look like themeforest-xxxxxxx-stanley-wp-theme . All the information you may need is located in it.
Theme installation
Install Stanley theme via WordPress
Step 1 - Login to your Wordpress Dashboard
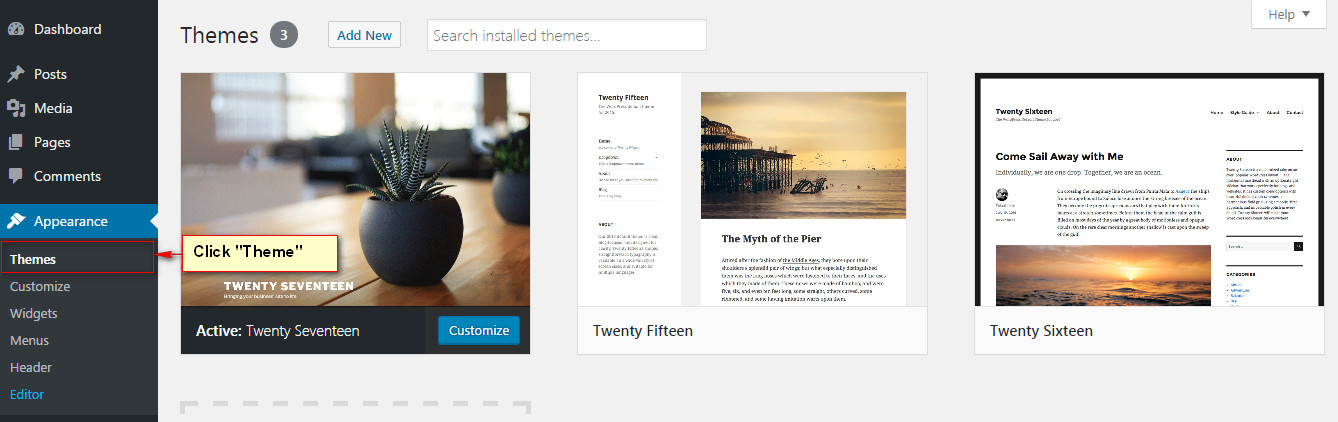
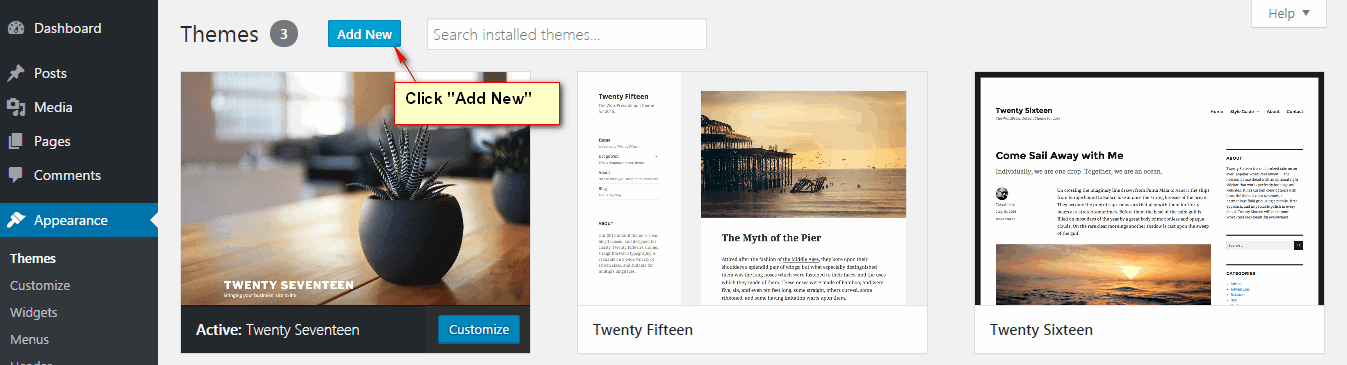
Step 2 - Go to Appearance → Themes. Click the Add New button or Add new theme link. (check screenshot below)
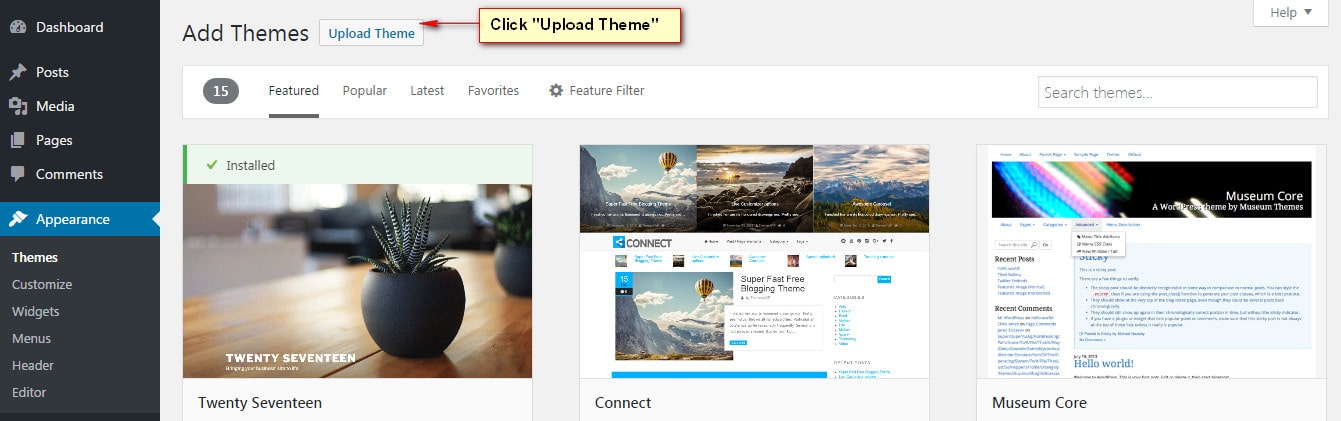
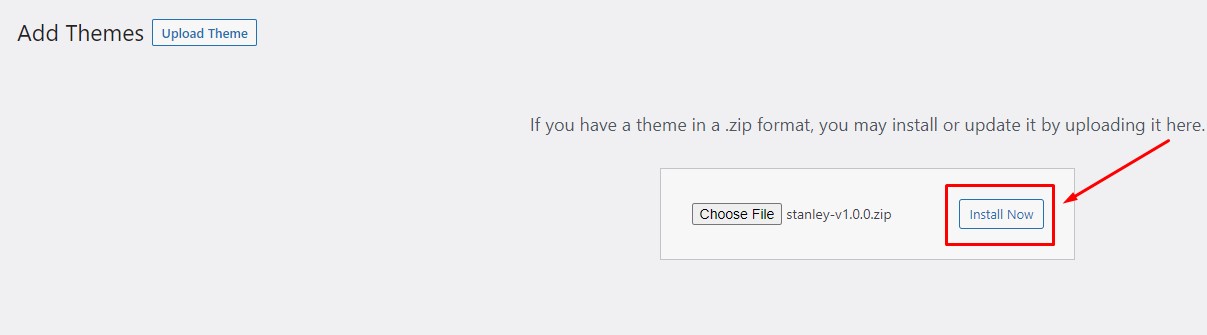
Step 3 - Click on the Upload Theme button. Locate stanley-version.zip(version: replace by value like: 1.0.0 or something like that) and click Install Now.
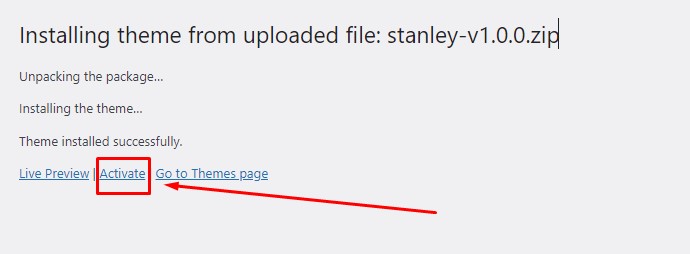
Step 4 - Click on the Activate button to activate Stanley.
In cases where you uploaded the files with other FTP tools, open the Wordpress dashboard and navigate to Appearance → Themes. You can Activate Stanley from the theme choices there.
If you don’t like following through the above mentioned step-by-step or need more instructions, then let’s go to consult our video guide on How to install Stanley theme with all demo content via WordPress below, it is the same with Stanley.
Congratulations, you have now activated Stanley! You can now proceed with Stanley's Plugin Installation.
Installation via FTP
You could consult our video guide on How to install an G5Theme item via FTP
Step 1 - Log into your Hosting server using an FTP client (like FileZilla or WinSCP).
Step 2 - Locate "stanley.zip" that you found in your ThemeForest Package and unzip it somewhere on your hard drive. Once it is unzipped it will look like a folder named Stanley with all theme files in it.
Step 3 - Locate your Wordpress installation and upload the theme directory Stanley (you unzipped in the previous step) into ../wp-content/themes/ in your Wordpress installation.
Step 4 - Click on the Activate button to activate Stanley. Congratulations, you have now activated Stanley! You can now proceed with Stanley's Plugin Installation.
Child Theme
A Child Theme is specifically for developers who are willing to make changes to the critical functions and codes (If you do not intend to go that far, you can ignore this chapter).
IMPORTANT : If you want to edit the templates and functions of a theme, we always advise you to incorporate or install Child Theme and make changes therein. To know more about the need and purpose of creating child theme, visit WordPress Codex on: codex.wordpress.org/Child_Themes.
In the downloaded theme package, you will see materials required for Child Theme named stanley-child.zip archive. You can install child theme in a similar way as you install main theme.
In the child theme, almost all files from main theme can be replaced. It doesn’t concern or affect only .php-files with templates and basic logics, but also .js and .css files from respective files and folders with images, icons etc,.If you are thinking about changing some functions of the theme or adding new ones, you have to create file functions.php in the Stanley-child folder, and add all requisite functions into it. If our WordPress theme has functions with such names, they will be replaced by yours, if not – your functions will complete the logics of our theme.
If you want to replace some functions from other files (except functions.php), we highly recommend you, NOT to copy-paste respective files into the child theme, but instead create the respective functions in functions.php in the child theme. This should be strictly implemented, so that while updating them, new functions from these files are available for use.
Plugins installation
All plugins required have been into your download package, so you only need to do is click on the "Begin installing plugins".
You can view this video below to install plugins and demo successfully
Before you install the plugins, you have two option:
1- You don't need to install the demo data and you can built the page you want by our templates, you don't need install/active G5 Install Demo plugin
2- You need to install the demo data, you need install all require plugins and active theme
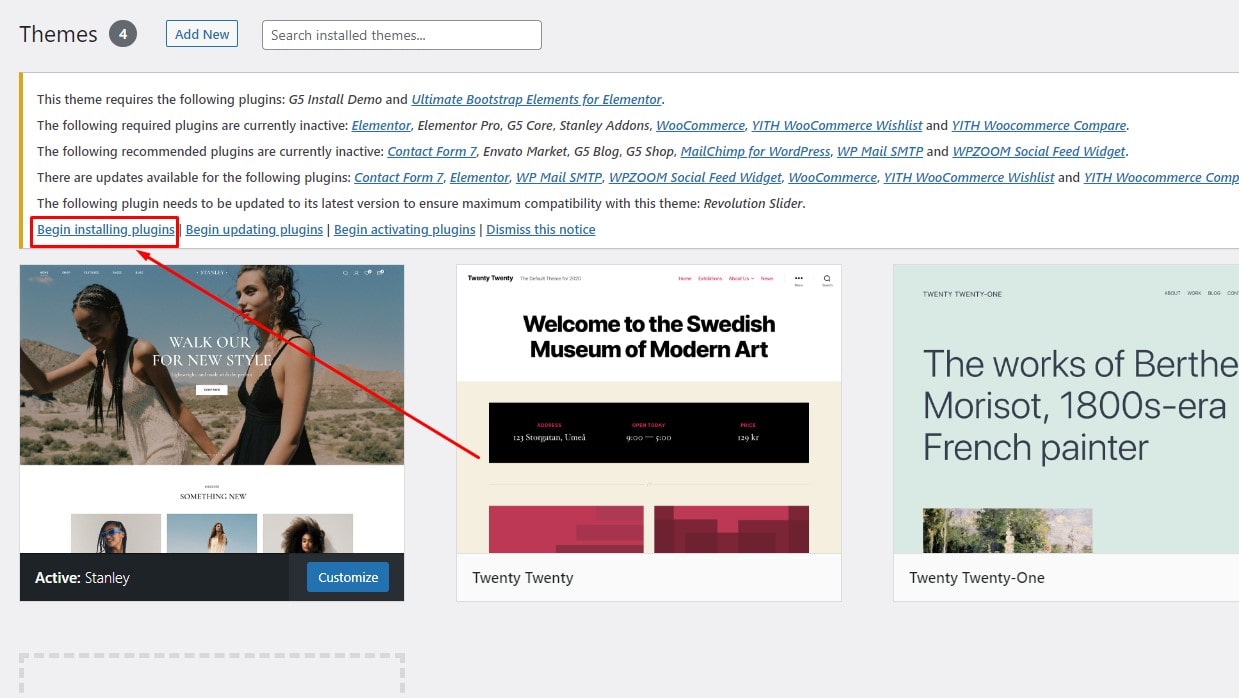
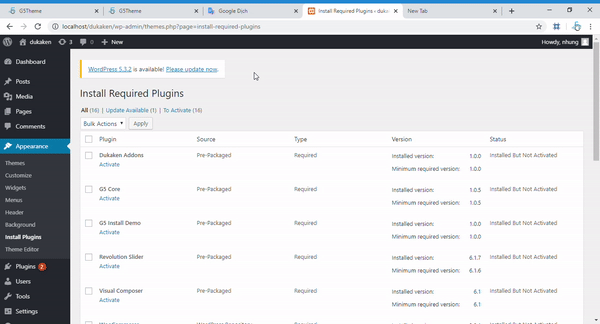
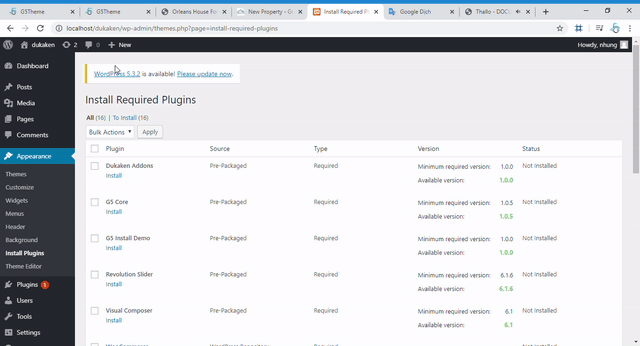
You should be navigated to the Install Required Plugin page, which shows reqquired plugins list, all you need is clicking on the checkbox beside "Plugin" label to select all plugins in the list, then choose "Install" from the drop-down list at the top and then click "Apply".
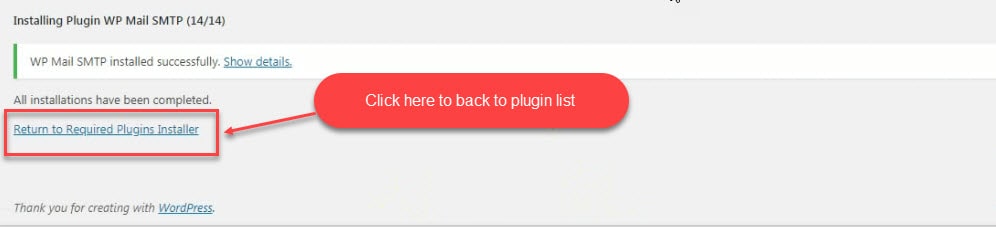
The installing process status will be shown in your browser. It may takes a few minutes, so please be patient. After sucessfull, your screen like that
When the notice "All installations have been completed" appears, click on the "Return to Required Plugins Installer" link to turn back to the plugin list.
Next, click on the box beside the Plugin label again to select all plugins and choose Activate this time as image below.