One Click Install Demo Data
With ORION, you can build a fully functional website just by clicking a button and install our demo data or click 5.2.1 Create A New Page to step by step. Your ORION installation will be set up with what we have on our demo website, and you can use it as a template to develop your own website.
Go to G5Theme => Install Demo
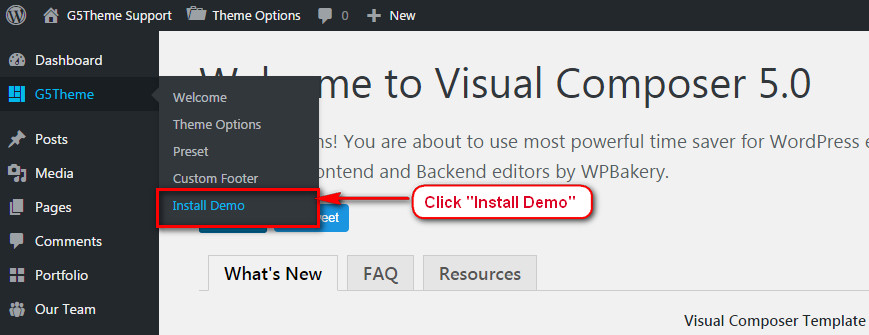
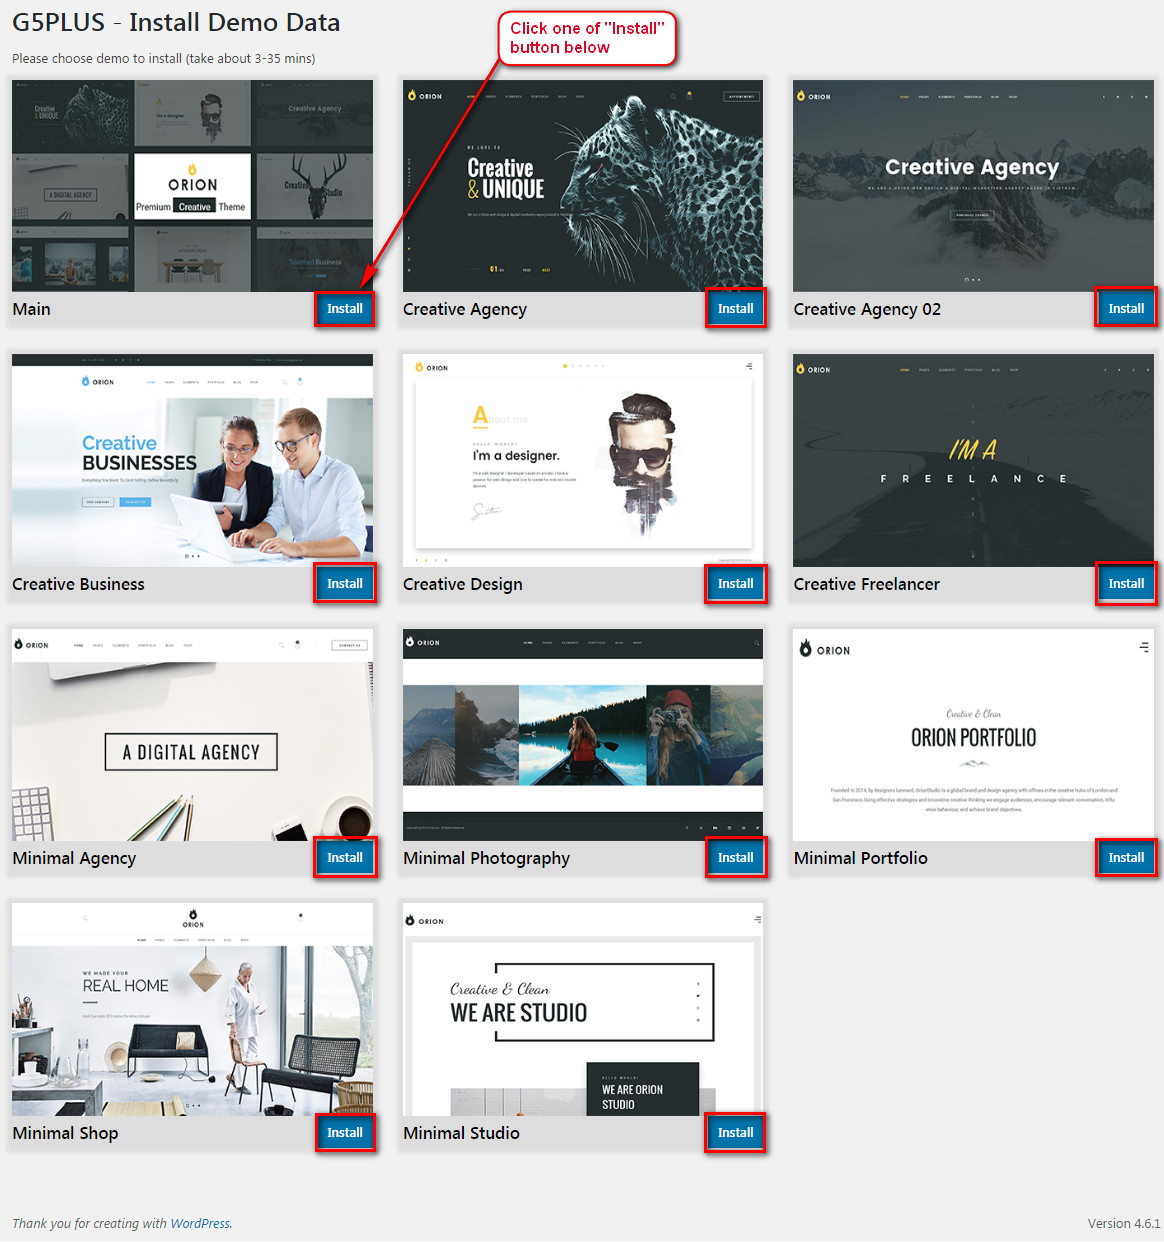
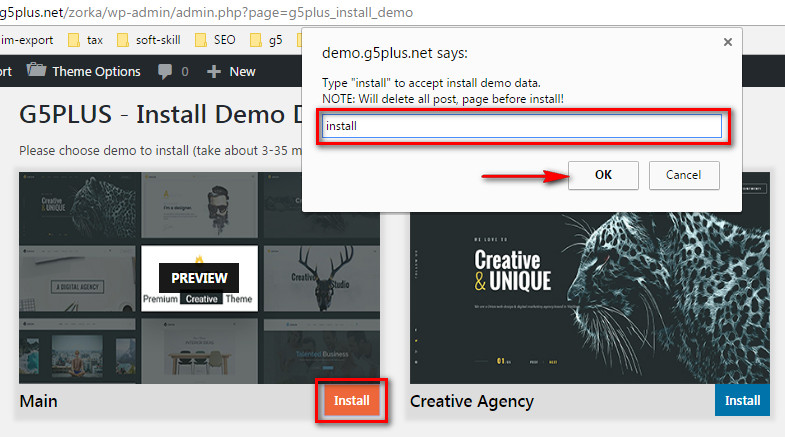
Then choose Install demo data you want:
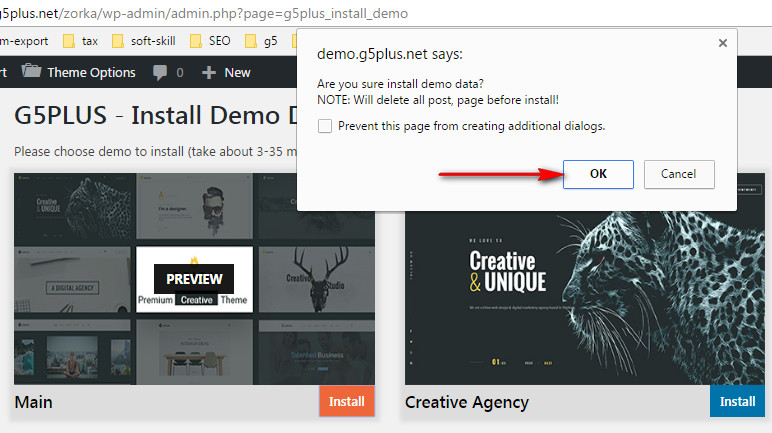
The process would be displayed on import status bars so you will know when it finish and your data is ready.
DONE. Now, you can visit your website to view demo.
Manual Settings Up
Building An Example
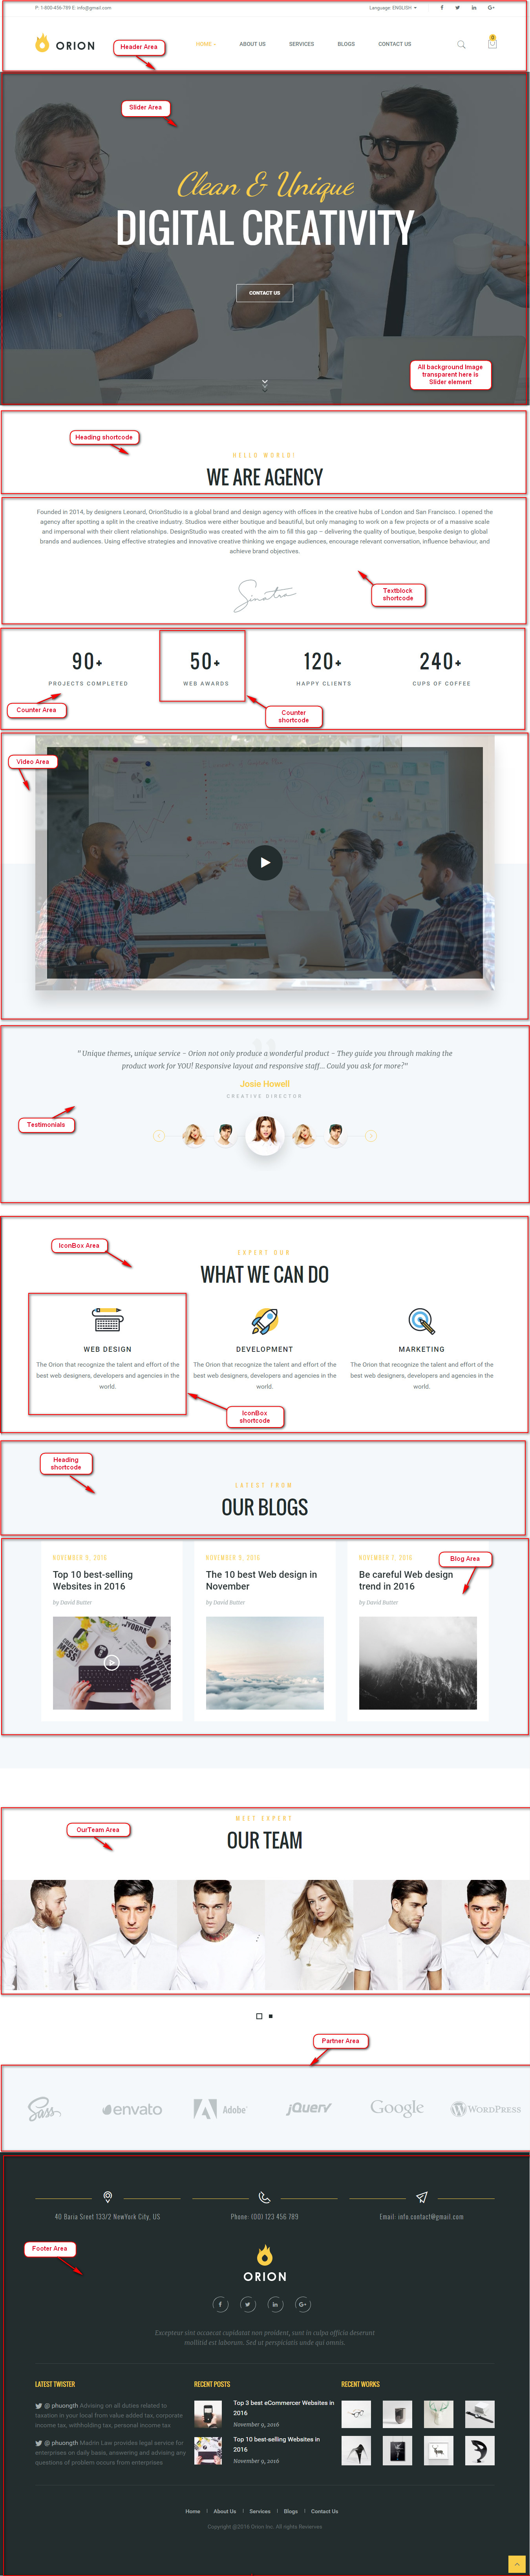
THIS IS STEP BY STEP GUIDE ON HOW TO BUILD HOME PAGE MANUALLY FOR ORION CREATIVE AGENCY 03 DEMO
Need Wordpress, Orion & plugins are already
I. Overview elements area on page
II. BUILDING
1. Build & Setting Top Bar area
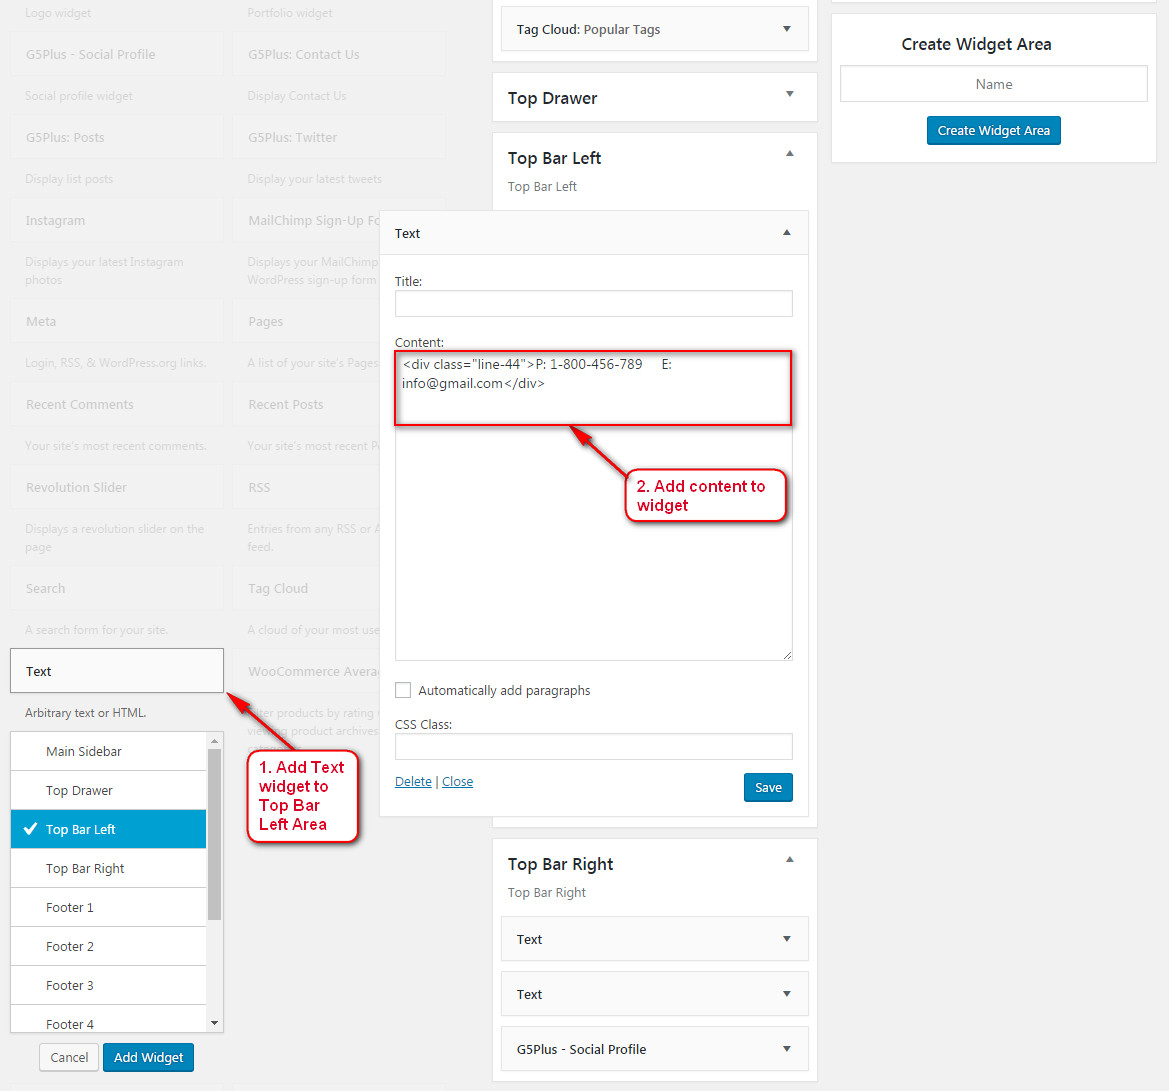
1.1 Build Top Bar Left

Add a "Text" widget to Top Bar Left Area
Go to Widget Manager and do follow
Add Text Widget
1.2. Build Top Bar Right
Add Two "Text" widgets and "G5Plus - Social Profile" widget to Top Bar Right Area
Add Text Widget 01
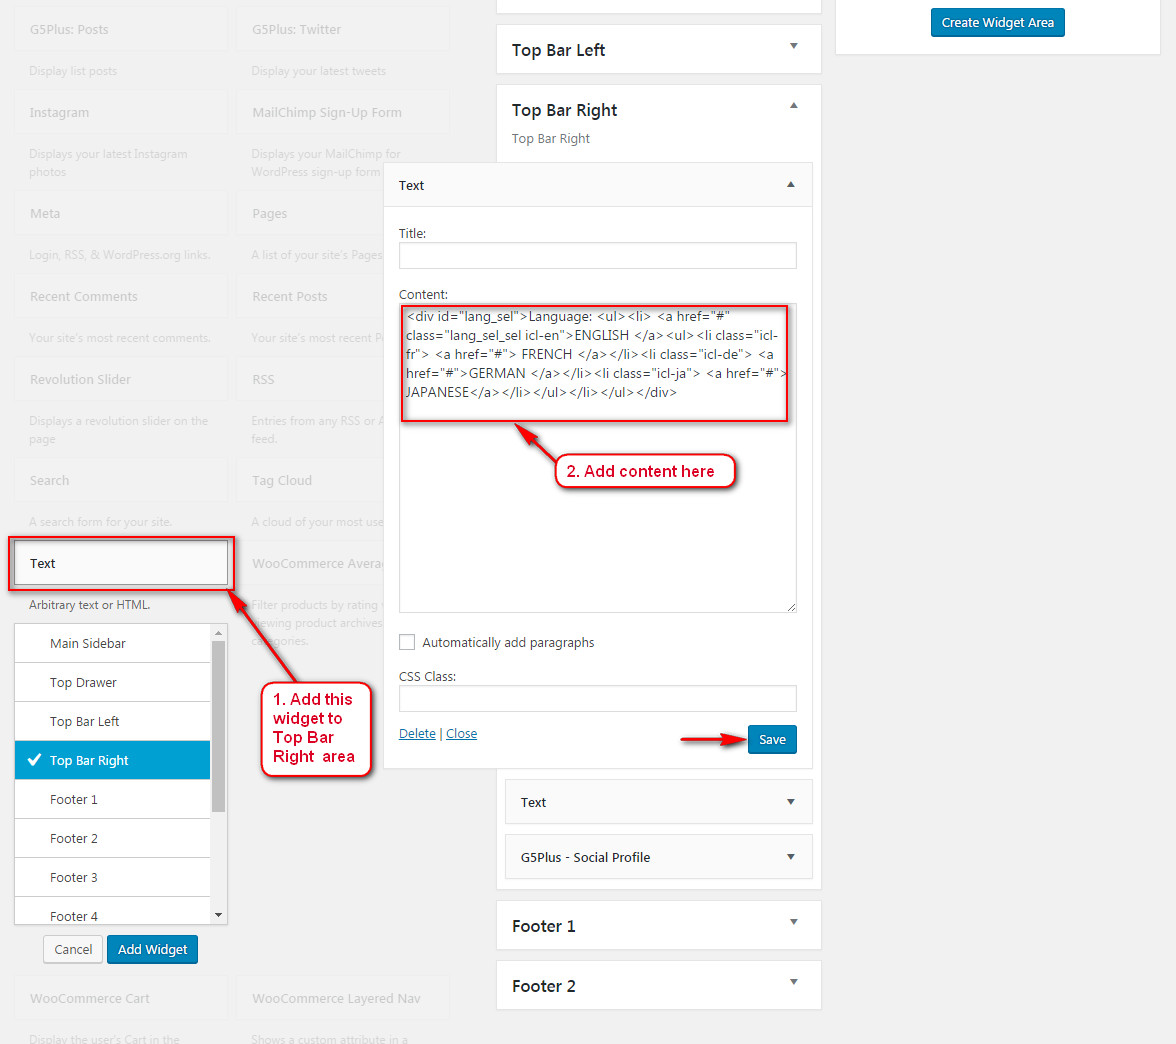
Code HTML
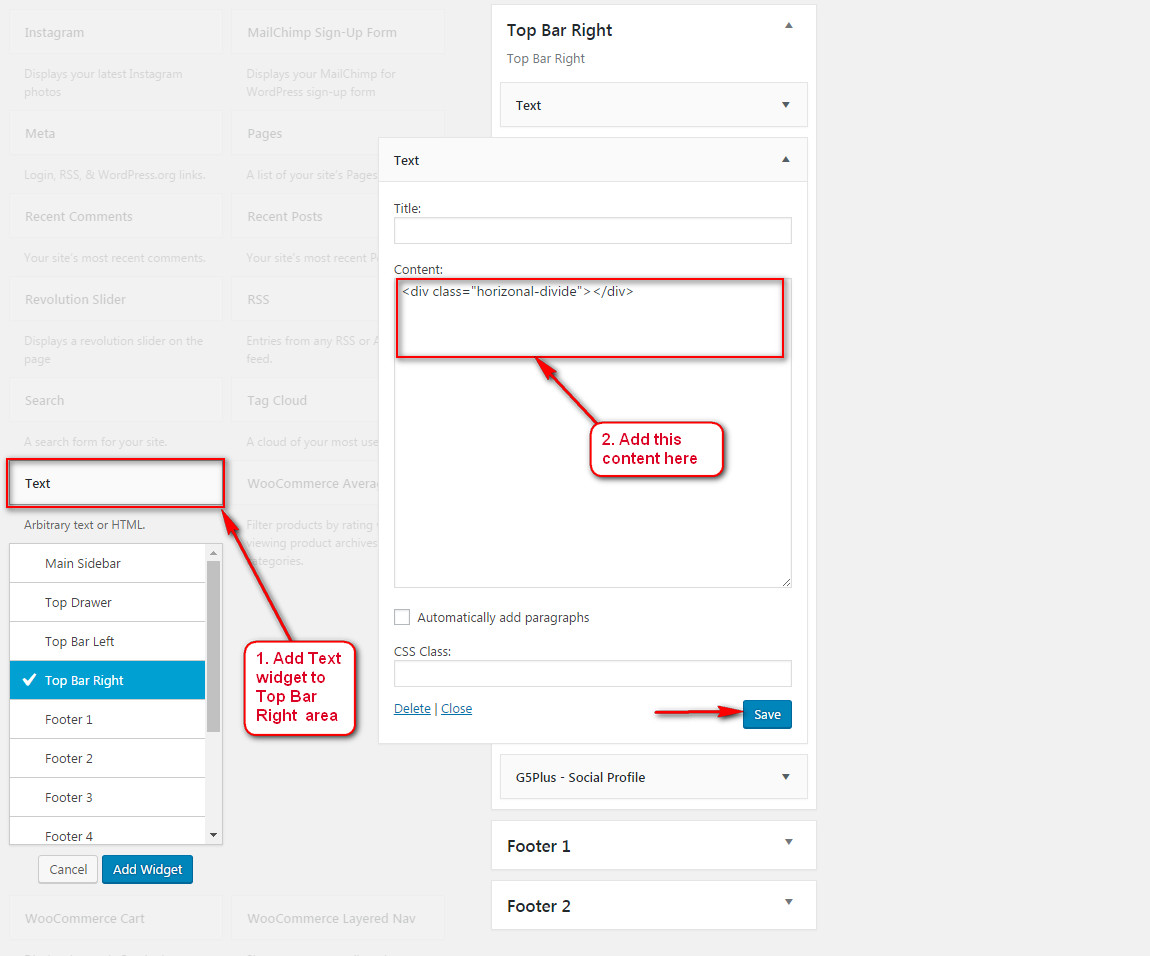
Add Text Widget 02
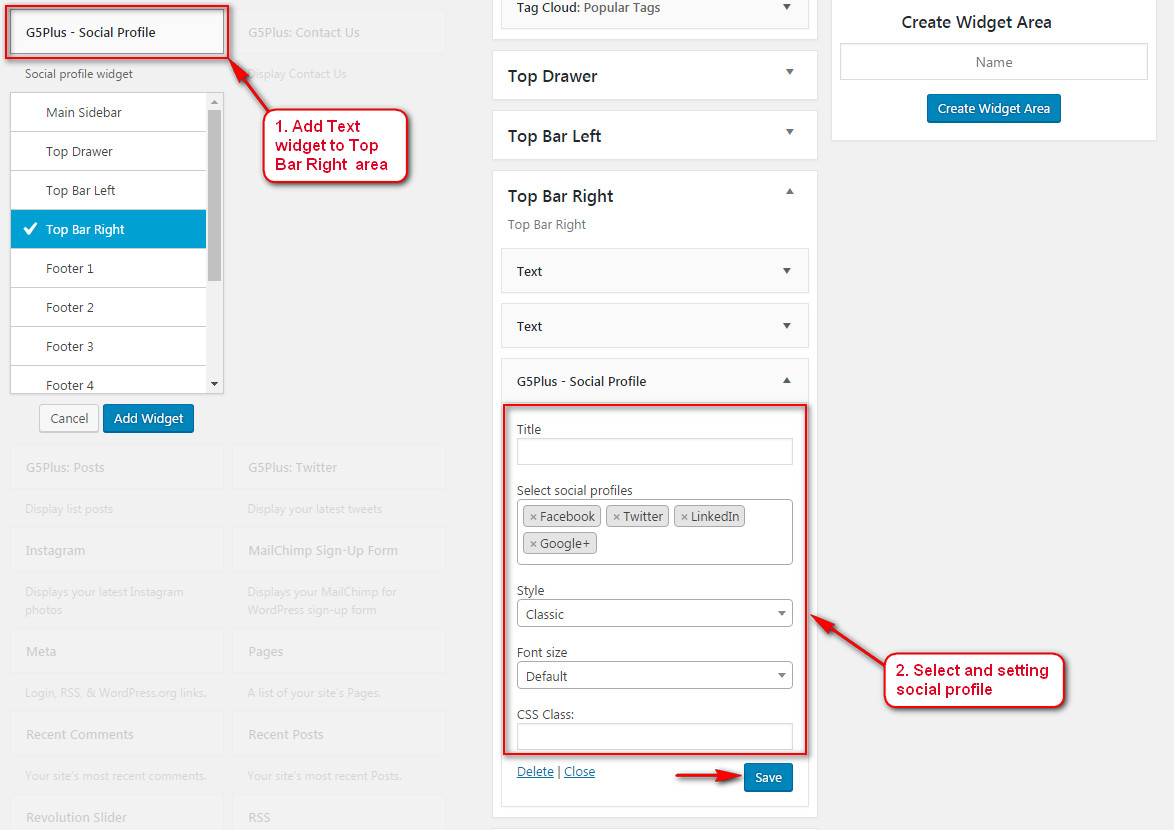
Add Social Profile Widget :
2. Build & Setting header area
You can consult this video guide on How to build Header Area
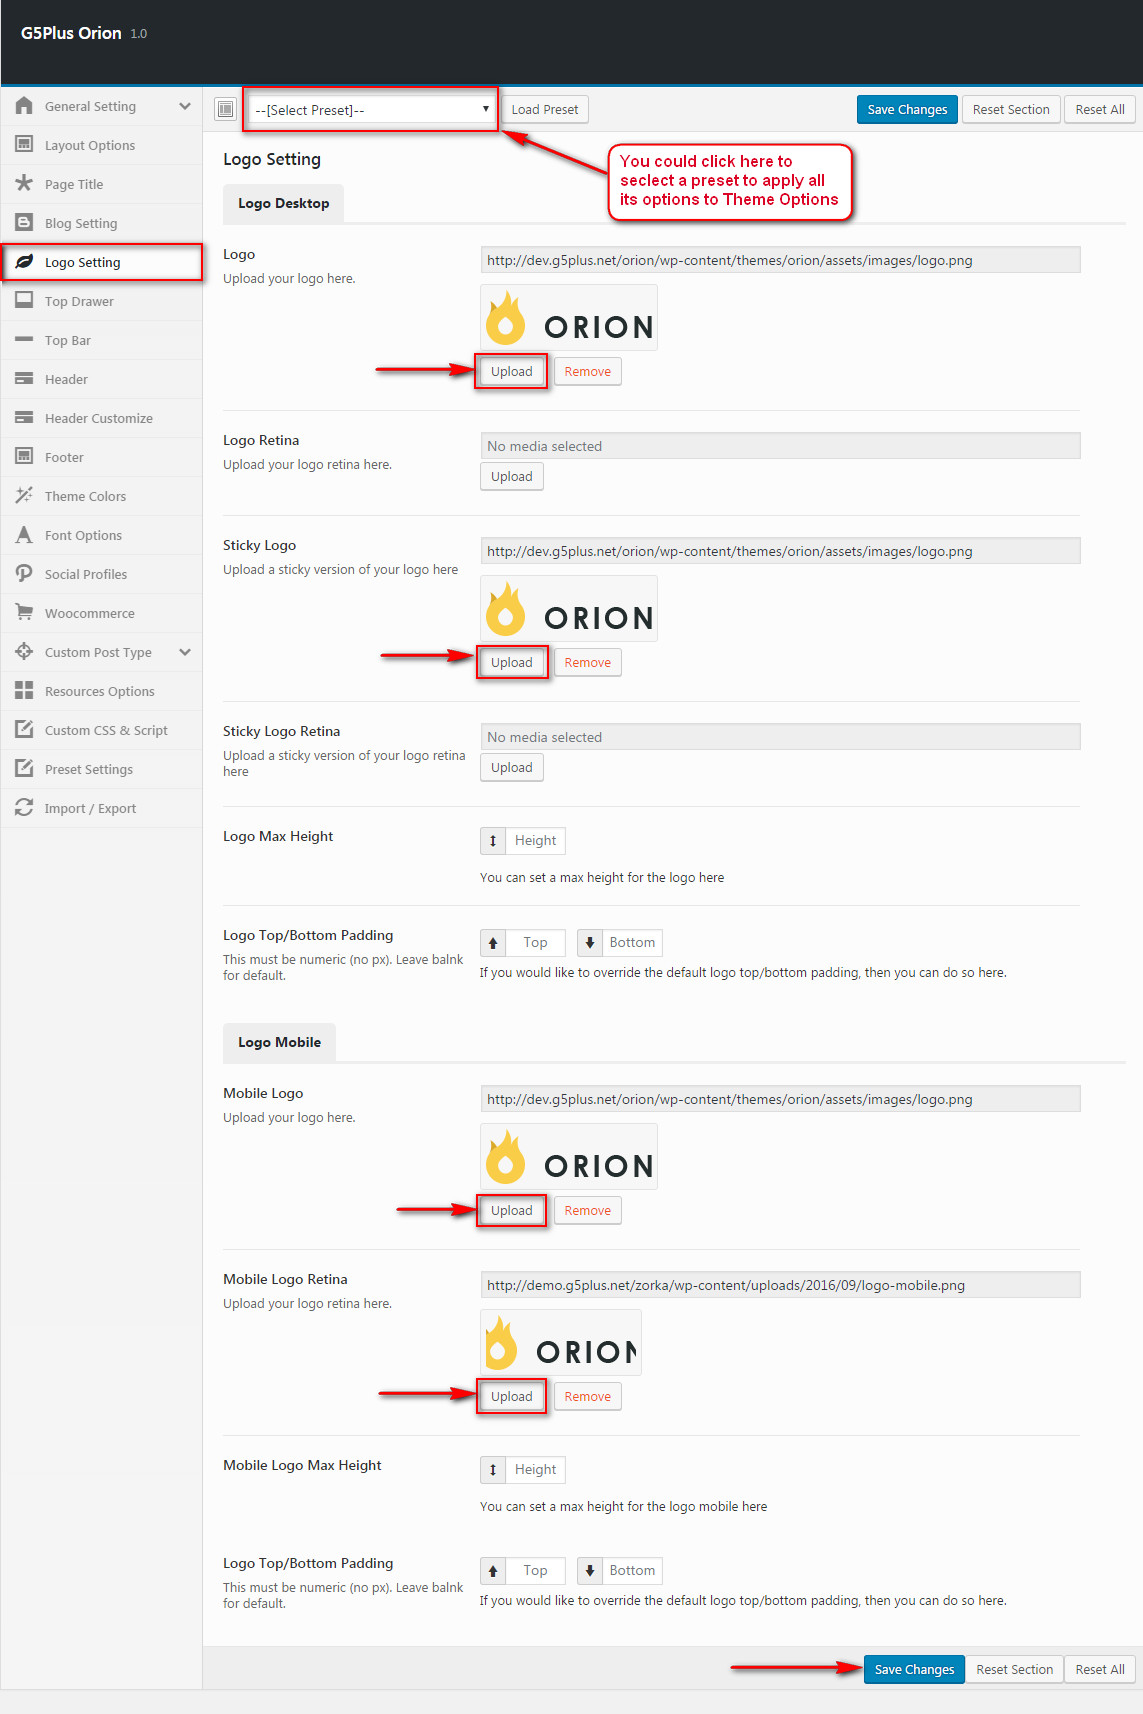
2.1 Upload logo
Go to ThemeOptions >> Logo Setting tab, and upload or choose an image from library to be Logo as you want:
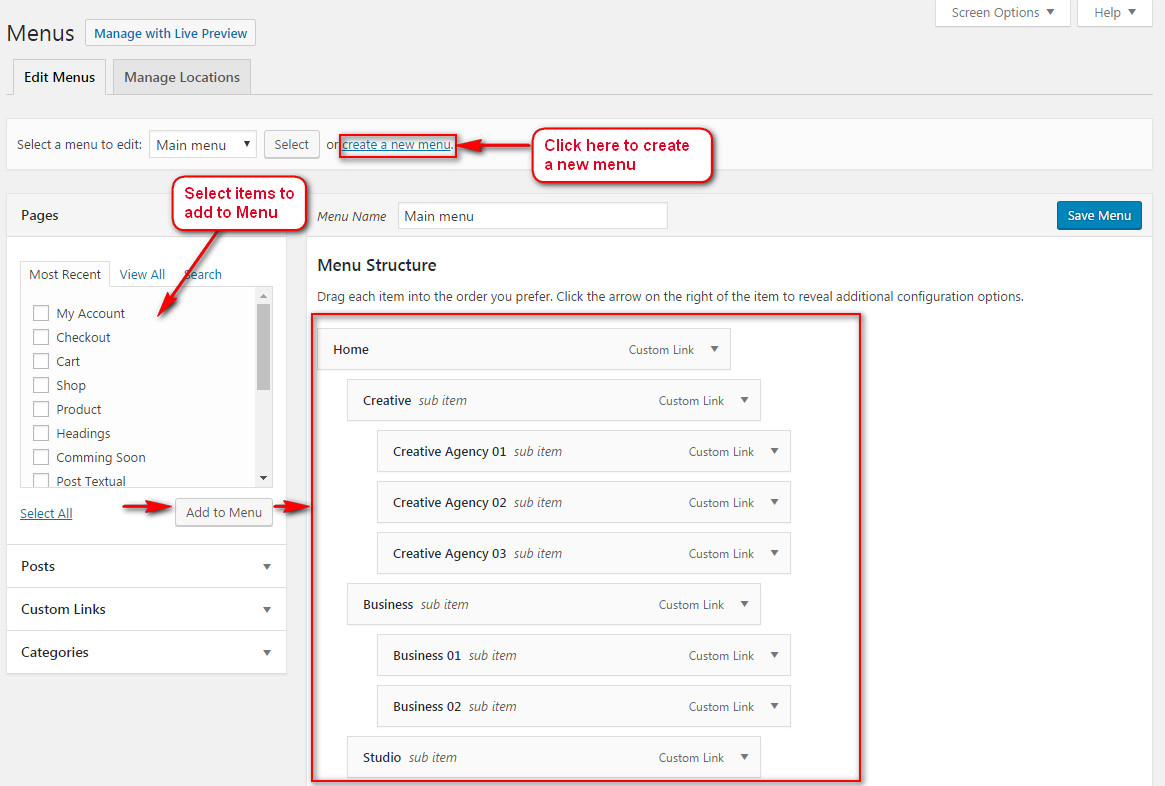
2.2 Create menu
Go to Apperance >> Menus, do follow:
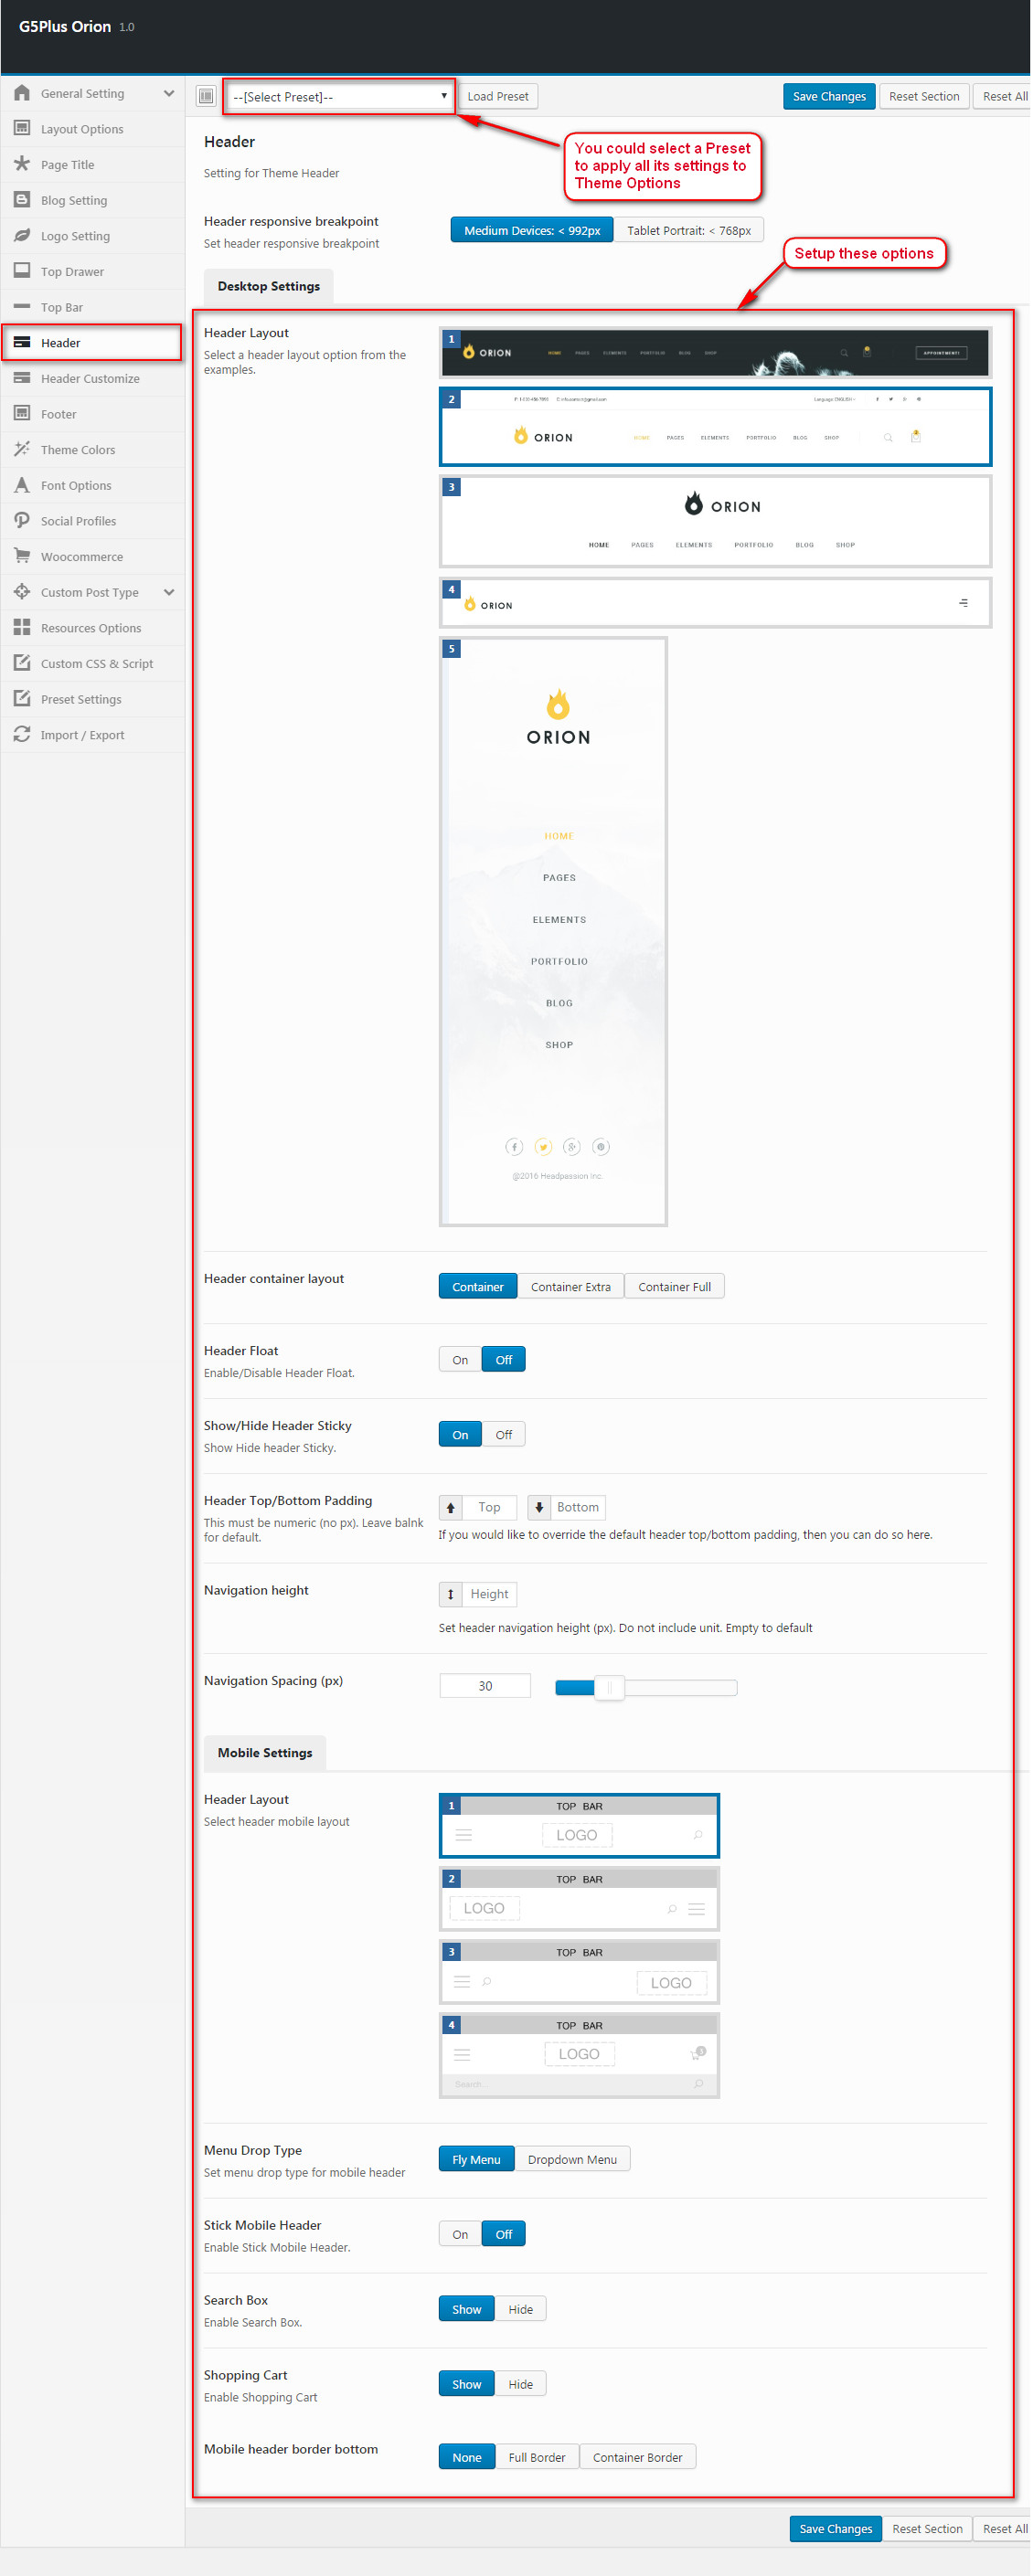
2.3 Settings
Go to ThemeOptions >> Header tab, then setup options for Header Area as your liking:
3. Import slider & create home page
3.1 Import slider simple
You can consult how to import slider at IMPORT SLIDER HOME PAGE
section.
And locate zip file slider to import on path: orion\wp-content\plugins\orion-framework\core\install-demo\data\creative-agency\revslider
3.2 Create A New Page
Click classic mode, add code below:
4. Choose Source Data Content For Portfolio,Our Team
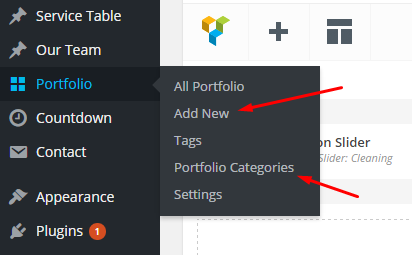
4.1 Choose data for Portfolio shortcode
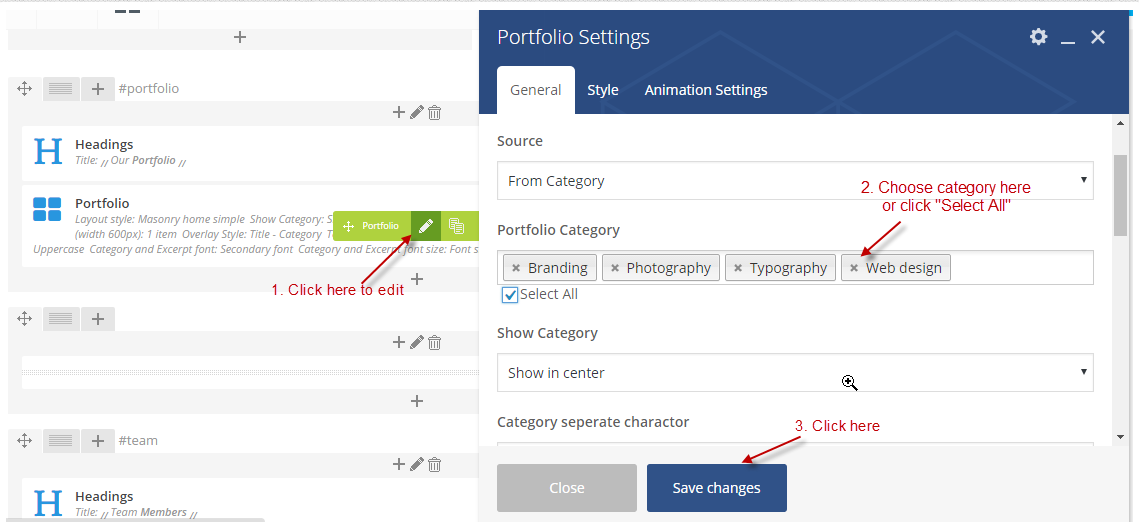
Follow below to create Portfolio item or Category
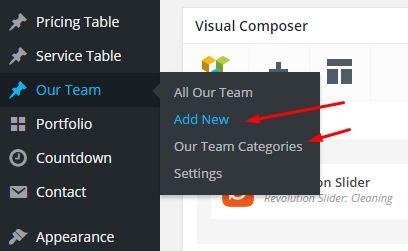
4.2 Choose data for Our Team shortcode
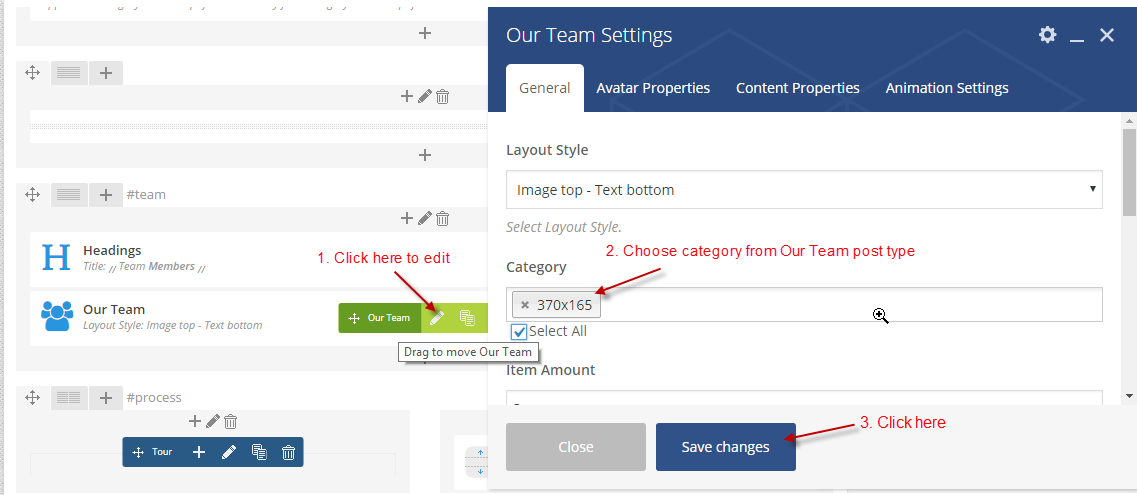
Follow below to create Our Team item or Category
5. Setting Footer & Create Content Footer
You could consult our video guide on How to build Footer Area
5.1 Settings Footer
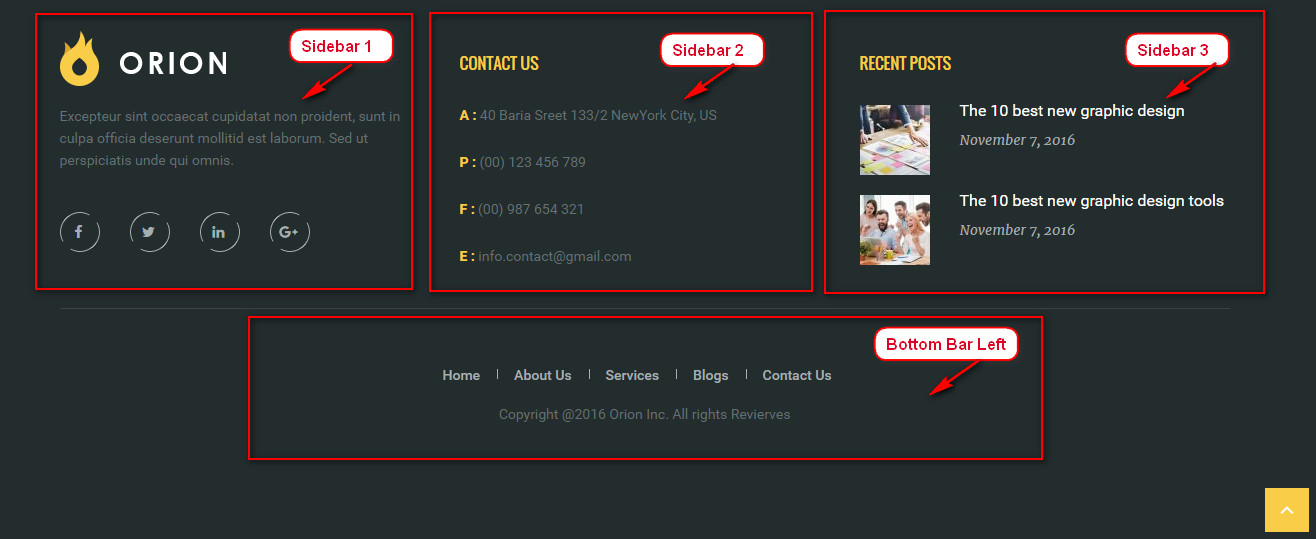
Footer Area on the frontend
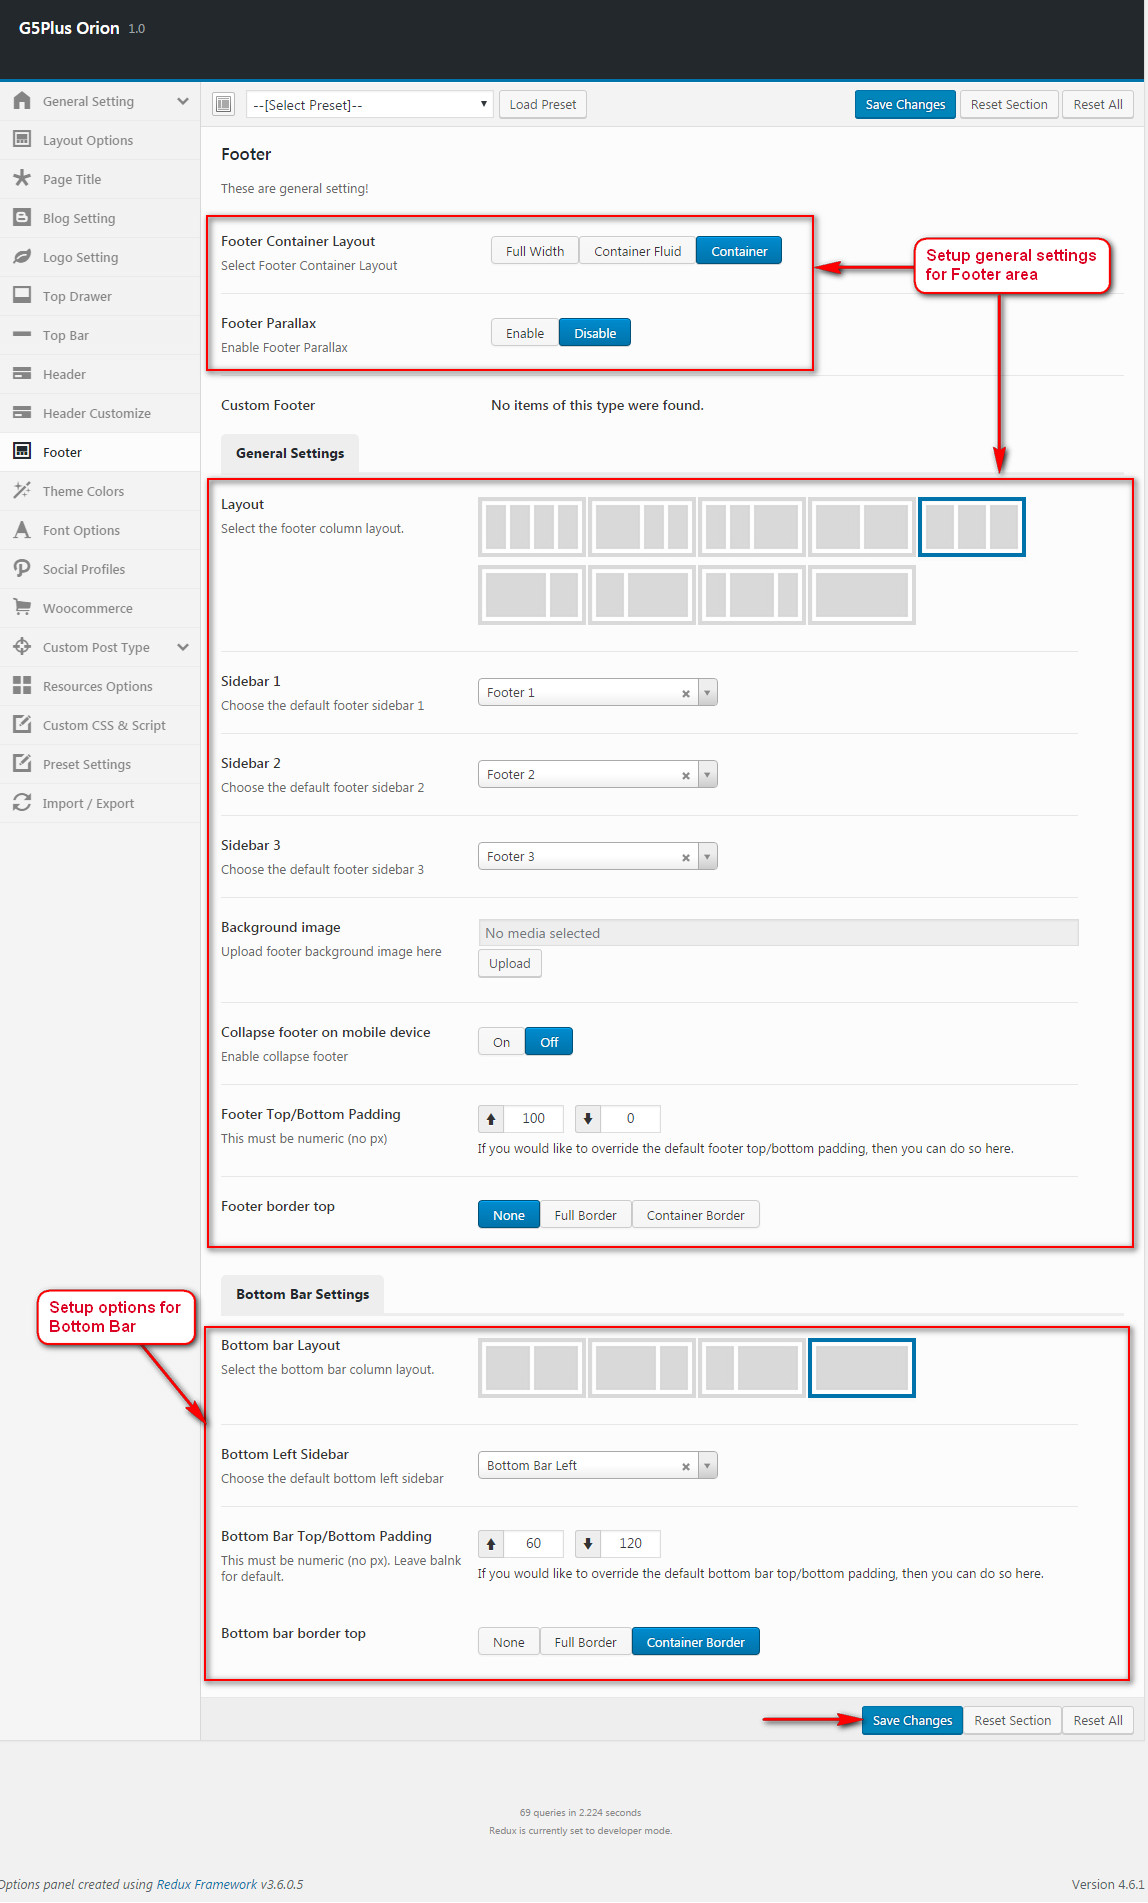
Go to ThemeOptions >> Footer tab, then setting below
5.2 Create Contact Form 7 for Footer
Go to Contact >> Add New and do follow:
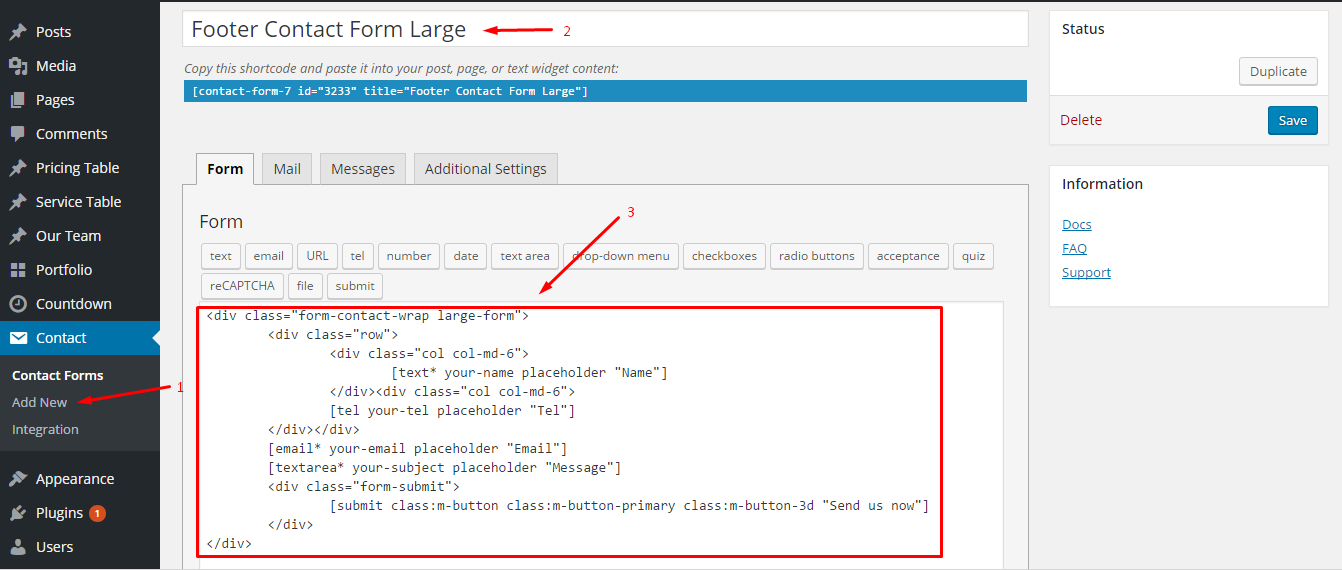
Code for contact here
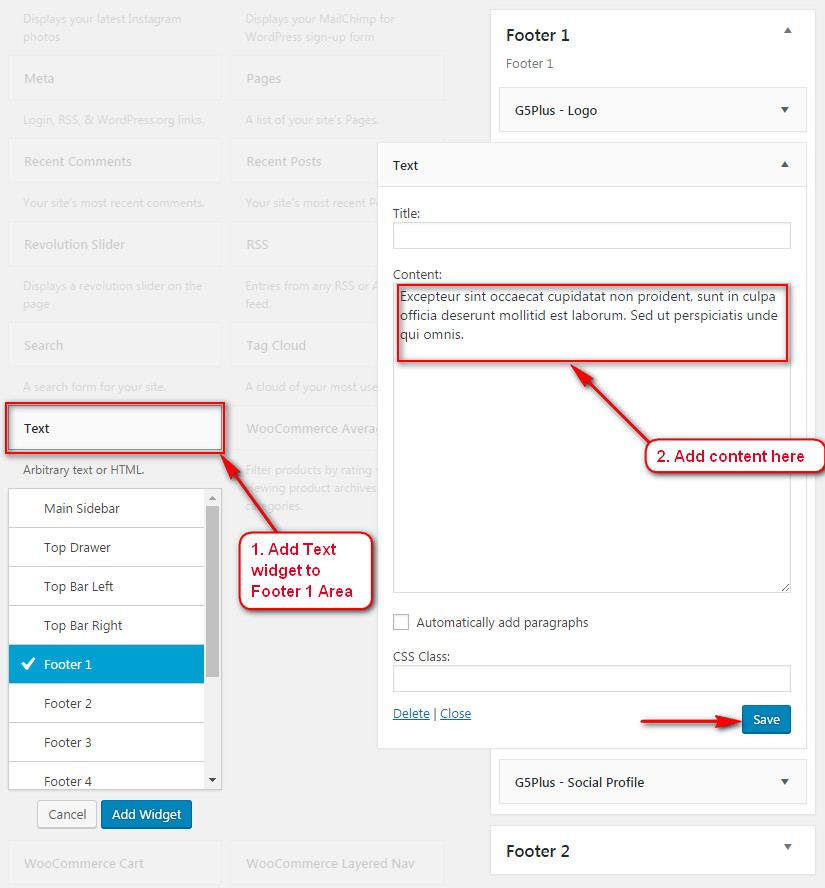
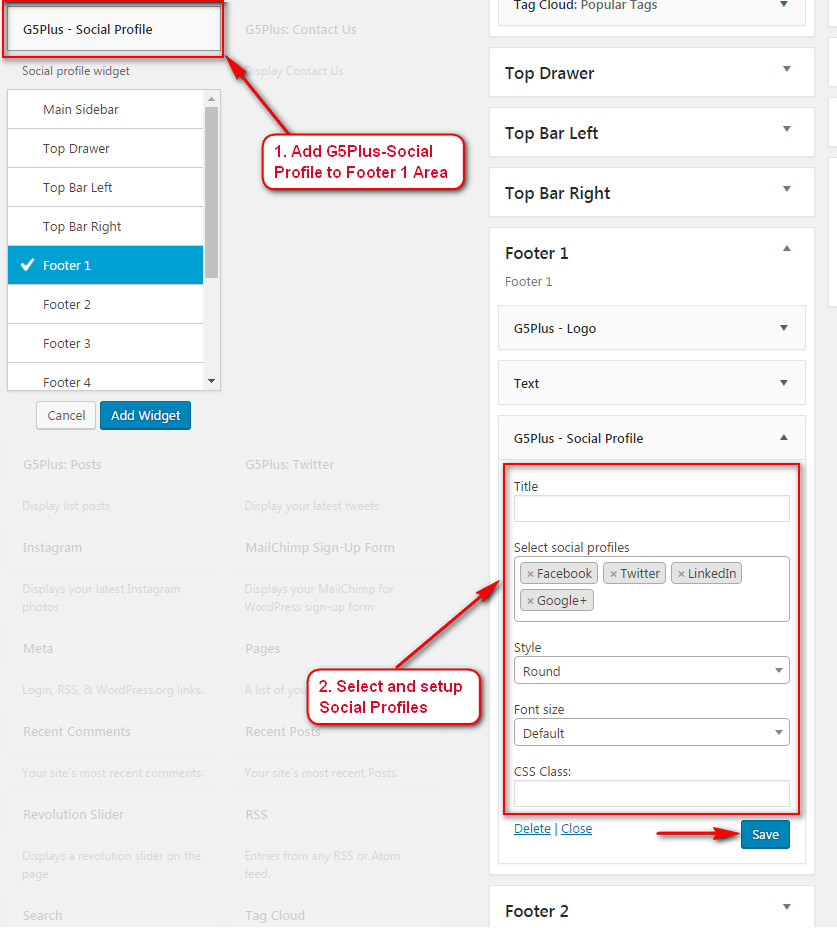
5.3 Add widgets to Footer 1 area
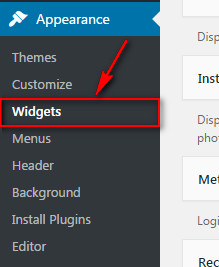
Go to Appearance >> Widget
Add G5Plus: Logo widget:
![]()
Add Text widget:
Add G5Plus: Social Profile widget:
5.4 Add widgets to Footer 2 area
Add Text widget to Footer 2

Code HTML
5.5 Add widgets to Footer 3 area
Add G5Plus - Post widget to Footer 2

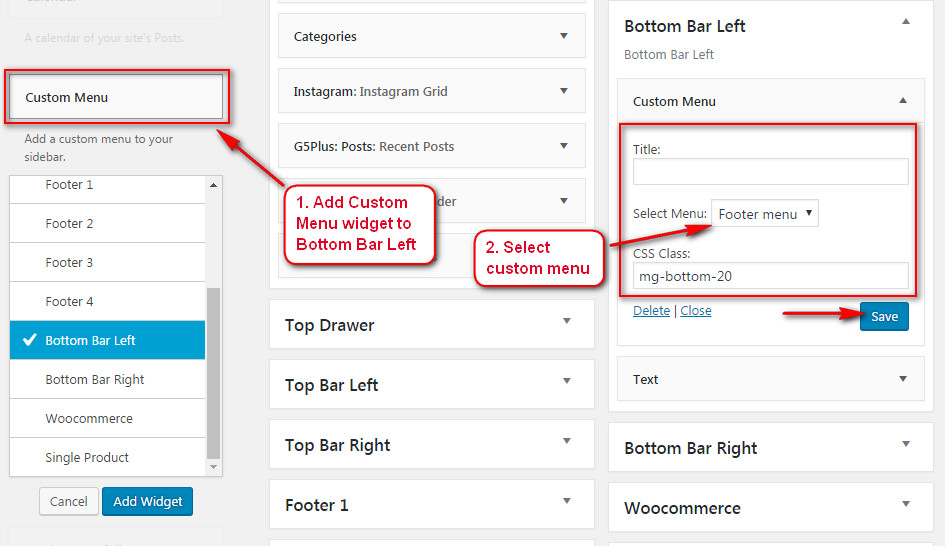
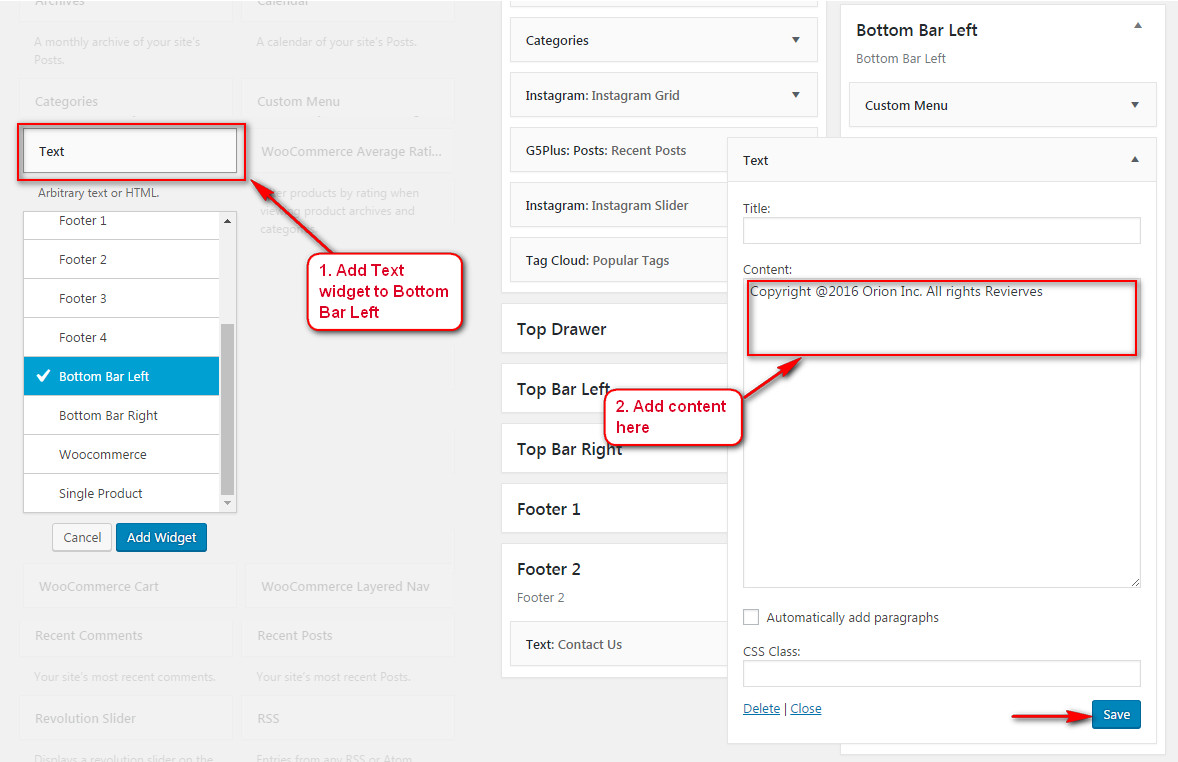
5.6 Add widgets to Bottom Bar Left area
Add Custom Menu widget to Bottom Bar Left area
Add TexT widget to Bottom Bar Left area
Import Demo Content
If you are new to WordPress and have problems with setting up the theme you might want to import the demo content file that comes with the theme. The following actions will import some dummy posts and pages from the live preview:
- Go to menu Tools > Import
- Select WordPress from the list
- If you haven't installed the WordPress import plugin, a popup window will appears and ask you to install it. Just click Install Now. When the installation progress is completed, click Activate Plugin & Run Importer. If you have installed this plugin, skip to next step.
- Click Browse and select demo-data.xml file from the download
package
(Example: Creative Agency on path: g5plus-orion\assets\data-demo\creative-agency, so the same for others) - Click Upload file and import
- When you are asked to import author, you can create new author or import to existing author. You also should check the Download checkbox and import file attachments.
Select WordPress from the list
Continue with steps in image
You would be asked to assign author, please selected and continue
After completing all above steps, open frontend screen to see your result.
If you don't want to use the demo content pack, you can read the instructions on how to work with our theme built-in Page Builder below to make your own pages.